Hi, I decided to write this guide for two main reasons, firstly I enjoyed making my openSUSE 10.3 Configuration Guide a lot as it taught me loads of new things about Linux and making tutorials, along with things relating to LaTeX. Secondly, a new version of openSUSE came out, version 11.1. I had been waiting for this release for a while as it was the first release which had a stable version of KDE4 as the default desktop environment. If I’m being honest then I’d have to admit that I love it. I enjoy using openSUSE 11.1 and I seem to be able to get on with my tasks more efficiently, perhaps that’s just the Linux under the hood though ;)
This guide is mainly a personal record of the things which I do to my installations to get them in a state which I find productive and efficient, as such, this guide may contain things which you personally do not wish to do in your individual situation - so don’t follow it blindly.
When you download openSUSE it is better to download the all-inclusive DVD version as this is more convenient in the future. It is highly advisable to keep hold of the ISO file once you’ve burnt it as it is useful later on in the guide. This guide was written specifically for openSUSE 11.1 and KDE 4.1 - follow it at your own risk. I have a little bit of experience with GNOME and XFCE but I prefer to use Qt based applications and environments. If you prefer GNOME or XFCE then the latter chapters of this guide may not be very relevant for you as the default applications will not be the same.
Have a lot of fun …
Installation
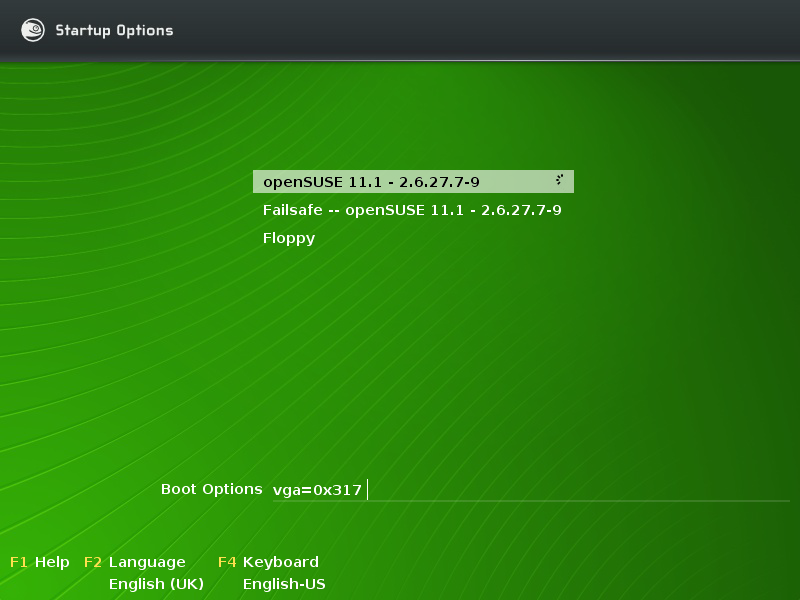
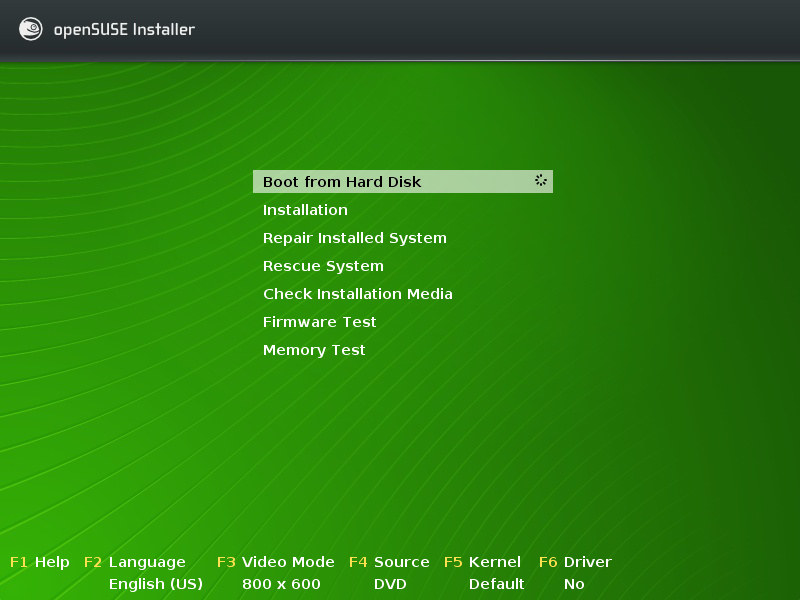
This guide covers a few aspects of the installation of openSUSE - it mainly covers the customisation and configuration of a new, clean installation. You may wish to read the openSUSE 11.1 Installation Guide if you need more help with the installation. To get the whole thing started you need to boot your computer from the installation DVD, if you’ve managed to do that then you should be presented with a screen like this when you switch your computer on:
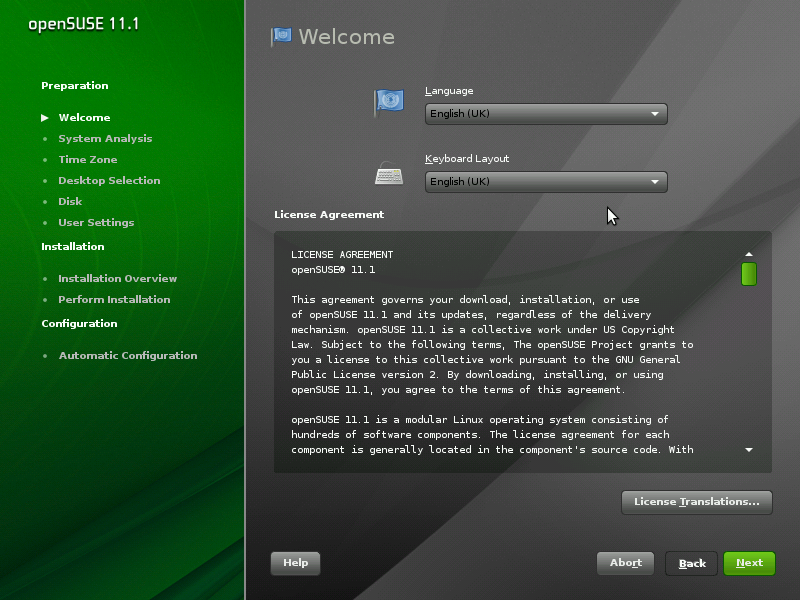
… so just select “Installation” and you can start the fun! Next, you will be presented with a language selection which looks like the screen shot shown below. Remember: it is worth setting this correctly as a US keyboard is different from a UK keyboard, particularly with the position of the @ and " symbols.
Desktop Selection
I have already mentioned that I like to use KDE over GNOME. So, during installation when you get a screen like this:
… be sure to select “KDE” ;)
User Details
You will then be asked to enter details for your user. On this screen I choose to change two of the settings. I choose to un-tick the two options which say Use this password for system administrator and Automatic Login. Once you’ve done this the screen should look like the one show below.
Boot Loader
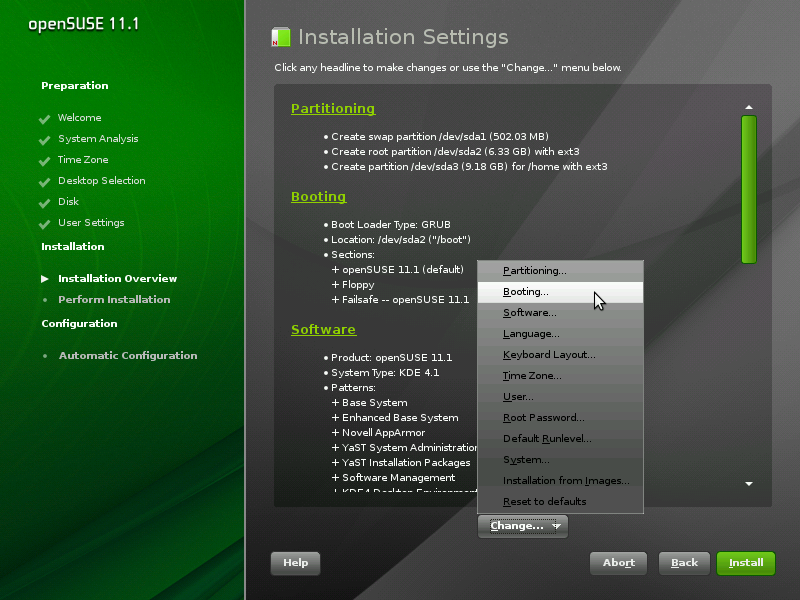
Once you have input all the details needed the installer will give you an installation summary before it starts doing anything. Unfortunately some things need to be changed here, one of these is a show stopper as far as I was concerned. As you may have guessed from this section’s title it relates to the boot loader. All you need to do is click the large button at the bottom which says Change … then Booting …, like so …
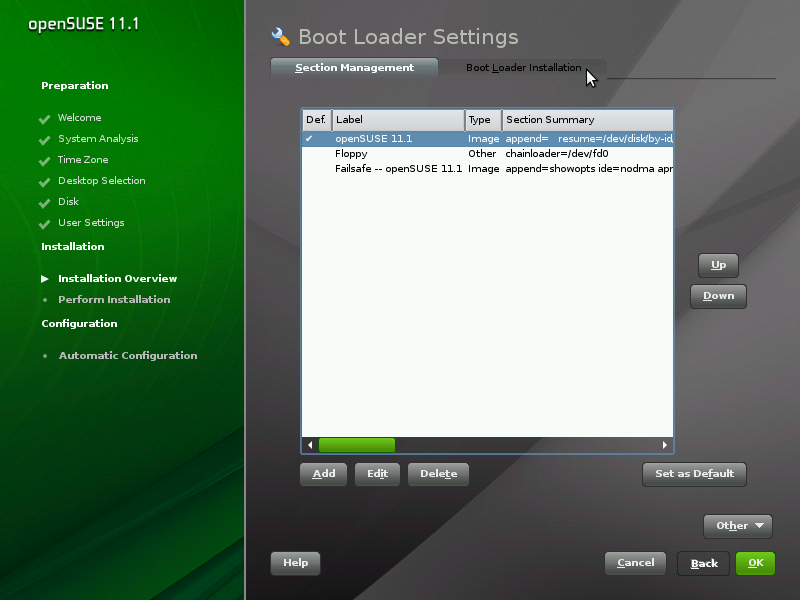
You will then be presented with a screen which looks like this one:
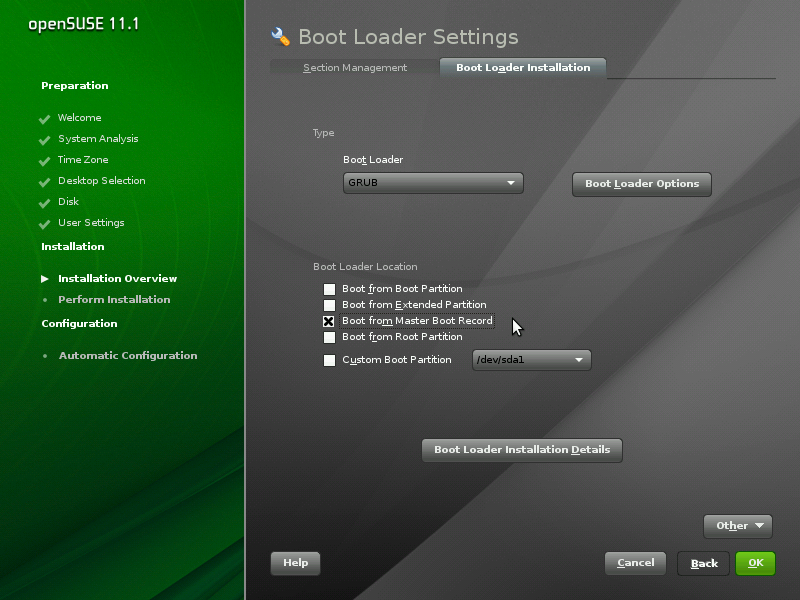
When you do, just click “Boot Loader Installation” at the top right of the screen. You will then be presented with the following screen:
As you can see I have un-ticked all options except “Boot from Master Boot Record”, you ought to do the same. If you don’t then you’ll have trouble getting into openSUSE after the installation has completed. Now just click “OK” and it’ll take you back to the installation summary screen.
Required Software
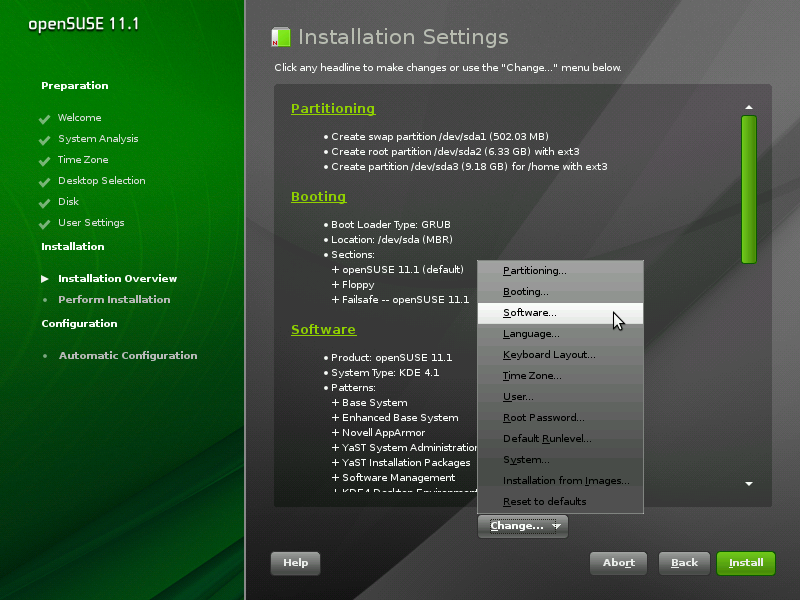
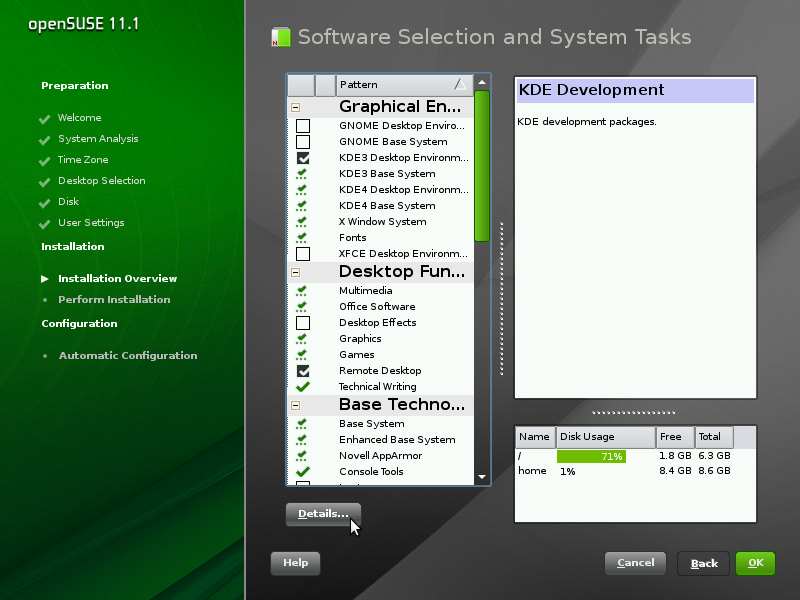
Once you are back at the installation summary it is also a good idea to change which patterns are installed on your system. Similar to how you changed the boot loader you now need to change the software, like:
Now you ought to ensure that the following patterns are ticked, if they’re not then just tick it yourself. Ones in italics are optional.
Graphical Environment
KDE4 Desktop Environment
KDE4 Base System
X Window System
Fonts
Desktop Functions
Multimedia
Office Software
Graphics
Games
Remote Desktop
Technical Writing
Base Technologies
Base System
Enhanced Base System
Novell AppArmor
Console Tools
Laptop
YaST System Administration
YaST Installation Packages
Software Management
Server Functions
File Server
Print Server
Web and LAMP Server
Propietary Software
Misc. Proprietary Packages
Development
KDE Development
C/C++ Development
Qt 4 Development
Notice that I have un-ticked “Desktop Effects”, this is because it just contains Compiz which isn’t very useful as kwin is much better within KDE.The next thing which we need to do is make sure that the package smpppd is installed as it is needed later on too. To do this just click on “Details”, like so:
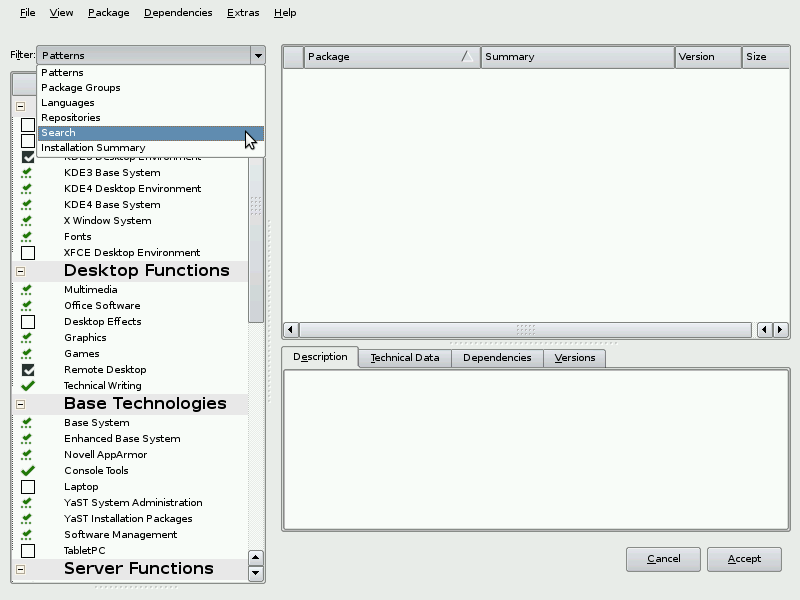
… which will take you to the next screen. On here you’ll have to use the drop down box to change the left-hand column to “Search”, like so:
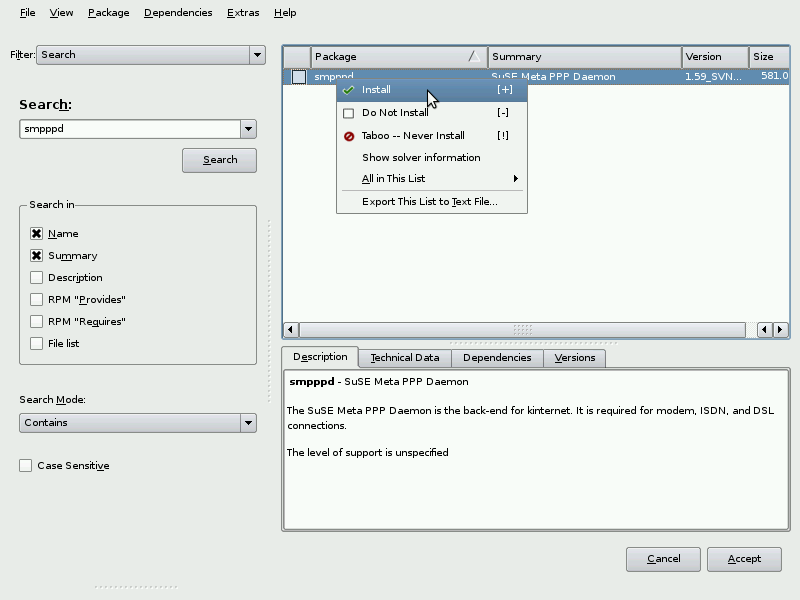
In this search box type smpppd and press Enter. One item should be shown to you on the right-hand side, right-click on it and click “Install” just like I have shown below:
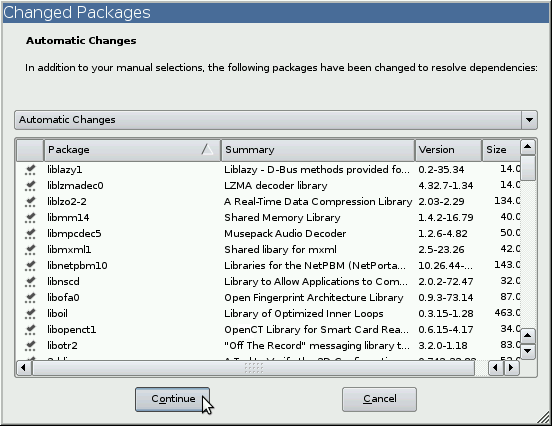
You can now press “Accept” and you’ll immediately be presented with a popup like the one shown below:
… just click “Continue” and you can do just that. That is everything you need to do during the installation phase - phew!
Checkpoint
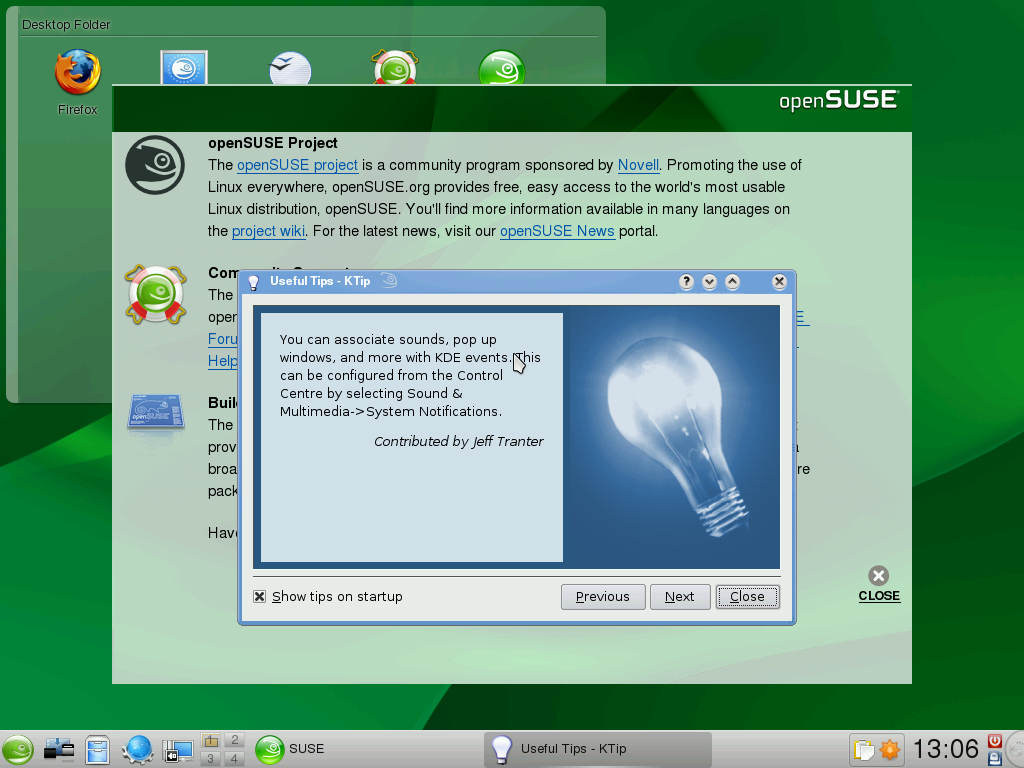
You should now have a clean installation of openSUSE on your machine and you shouldn’t have done anything to anything so you should have a new, untouched installation. Your desktop should therefore look identical to this:
If you’ve reached this far and your desktop looks like the screen shot above then you are ready to follow the rest of this guide.
Basic Setup and Installing Programs
This section will cover some basics on how to configure your system, such as software and services. Here we’ll install all the software you may want along with configuring the Apache web server and a FTP server - if you want them. A little note: in the world of openSUSE a piece of software is called a package, so the following section concerns installing packages, not software.
Konsole
It’s worth clarifying what “Konsole” is. Konsole is a command line tool. It is very important and powerful, many of the notes on this tutorial ask you to use it. Most people are scared or apprehensive about using it for some reason, thinking it is too complicated or dangerous - it’s really not.
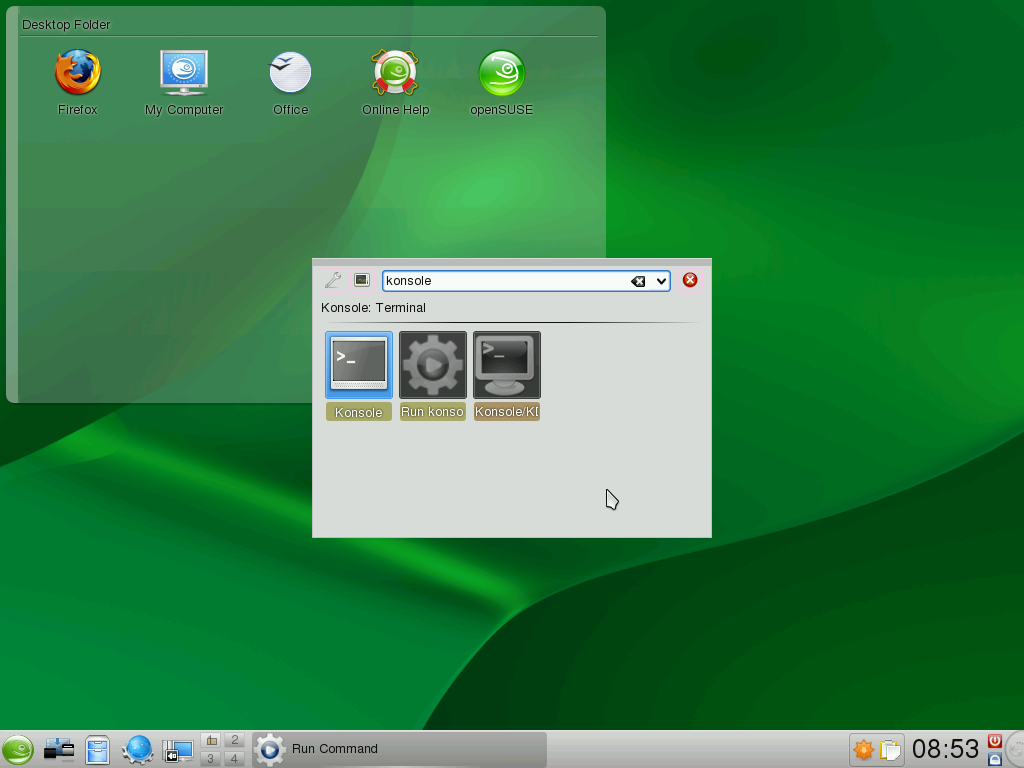
There are loads of ways to open up a Konsole window. Perhaps the quickest is to press Alt-F2 then type konsole and press Enter. A little screen shot is shown below illustrating how this is done. It is worth getting used to this method of using Alt-F2 as it is very quick and easy and it will be used many times in this tutorial.
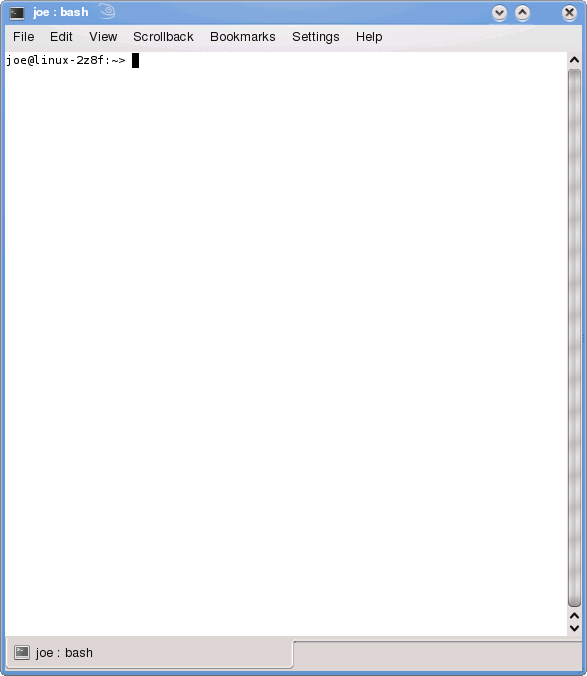
Screen shot of a Konsole window is shown below.
We just need to configure Konsole so that its history is unlimited. This means that if you type a command in the Konsole and it produces lines and lines of output you can still scroll up to the beginning to see what started it all off. So, open up a Konsole window and follow these instructions:
Click “Settings”
Click “Edit Current Profile …”
Click “Scrolling”
Click “Unlimited scrollback”
Click “OK”
Now close it down and we’re ready to continue. Simple, eh?
Sudo
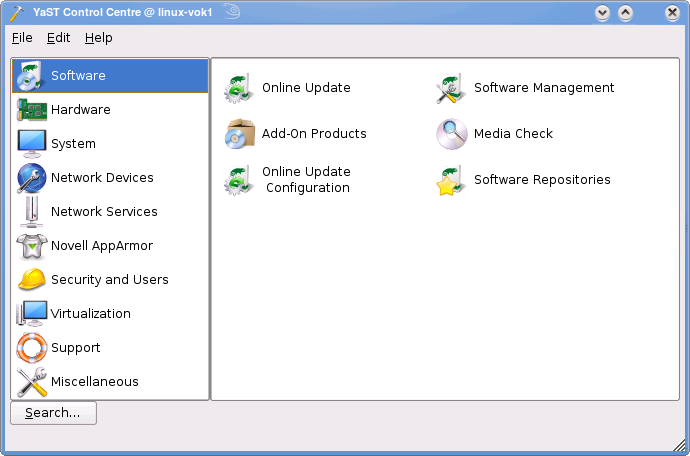
We’re going to use a program called YaST for the first time here so it’s worth clarifying what “YaST” is too. YaST is the main piece of software we’ll use to change the configuration of the computer. Screen shot of YaST is shown below. It can be accessed by pressing Alt-F2 and typing yast followed by pressing Enter.
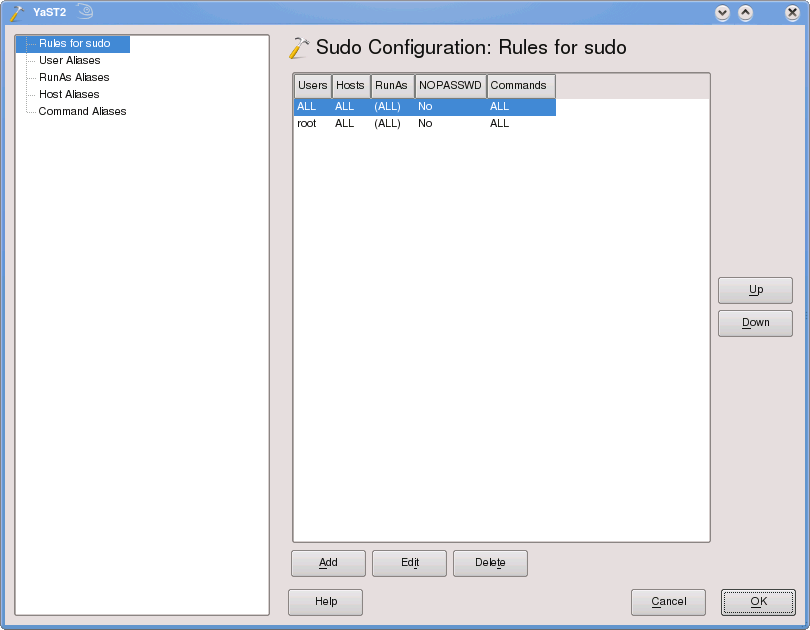
To make things easier in the future it’s best to give yourself administrator privileges by making your user a pseudo-root user. This means you’ll no longer be asked for the root password when typing certain commands in a Konsole window. This does, however, bring with it certain consequences as it means your username is inherently more powerful and can therefore do more damage to your system if you make a mistake or if your credentials are compromised. It is your choice if you decide to do this, if you don’t then it just means you’ll be asked for the root password every now and then. To do it you need to open up YaST and click “Security and Users” → “Sudo”. You should now be presented with a window like:
To continue:
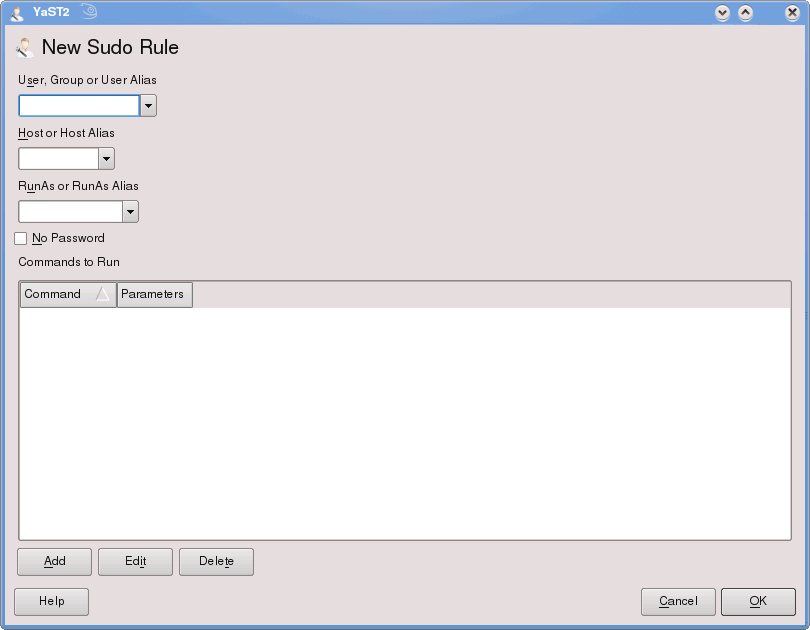
Click “Add” and you should be presented with a dialog like this:
Select your username under the “User, Group or User Alias” drop-down box
Select “ALL” under “Host or Host Alias”
Select “root” under “RunAs or RunAs Alias”
Under “Commands to Run” click “Add” then select “ALL” from the drop-down box.
Click “OK”
Click “OK” again
Click “OK” once more.
Groups
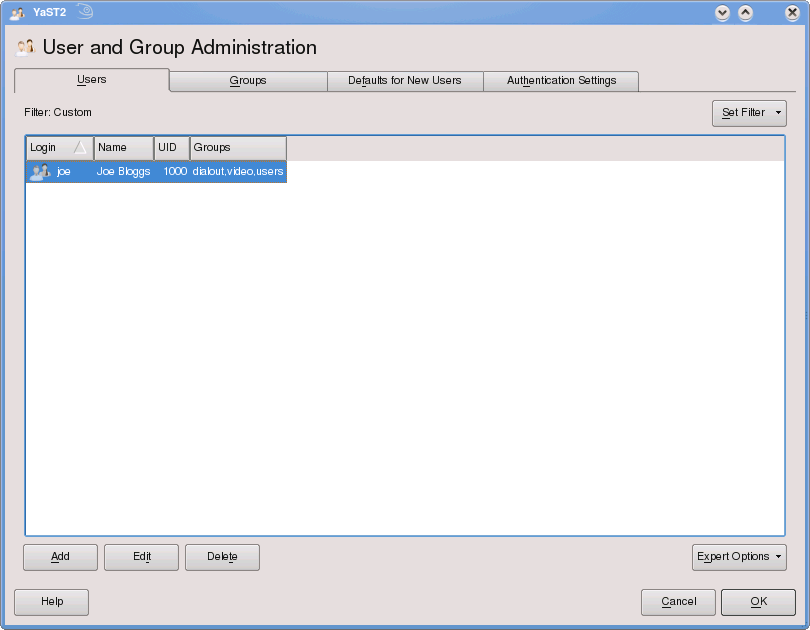
Right, to enable you to do basic things on your computer you need to check which groups your username is a member of. To do this one should use the “User and Group Management” part of YaST which looks like this:
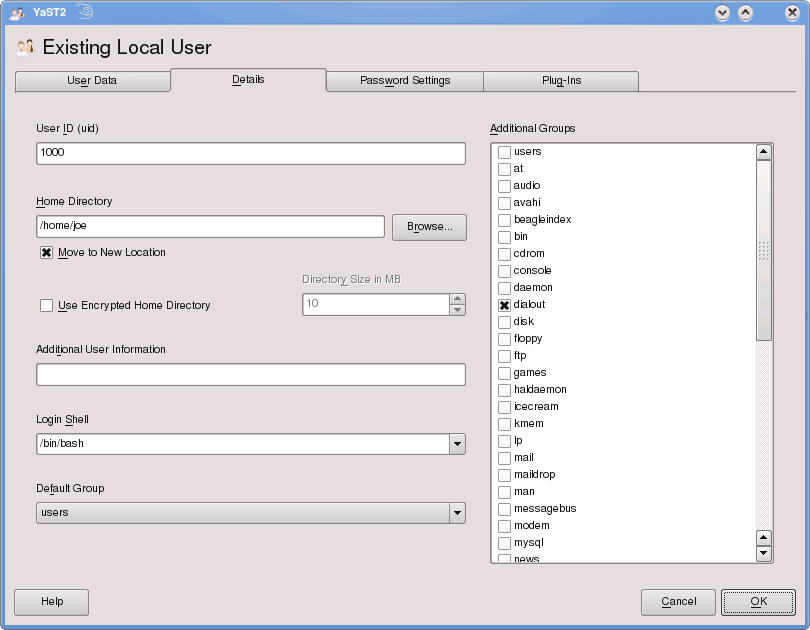
Select your username and click “Edit” then click “Details” at the top and you should be presented with a screen like this:
You need to ensure that you are a member of the following groups.
audio
cdrom
dialout
disk
video
wheel
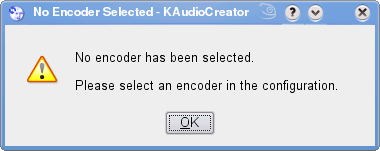
Now you just need to click “OK” and “OK” again and the changes won’t take effect until you’ve logged out and back in. This step was discovered after I was having a lot of difficulties using KAudioCreator to rip some CDs, fortunately this thread called No longer able to rip audio CDs with KAudioCreator on Linux Questions was able to help me work it out.
Network Activation
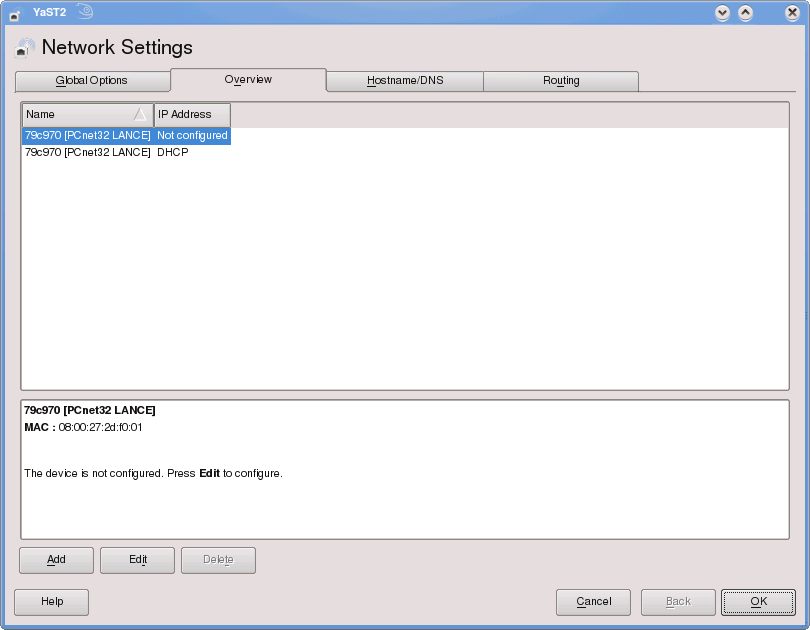
By default network adapters are disabled in a basic installation. To enable them is quite easy, just click “Network Settings” under “Network Devices” in YaST like this:
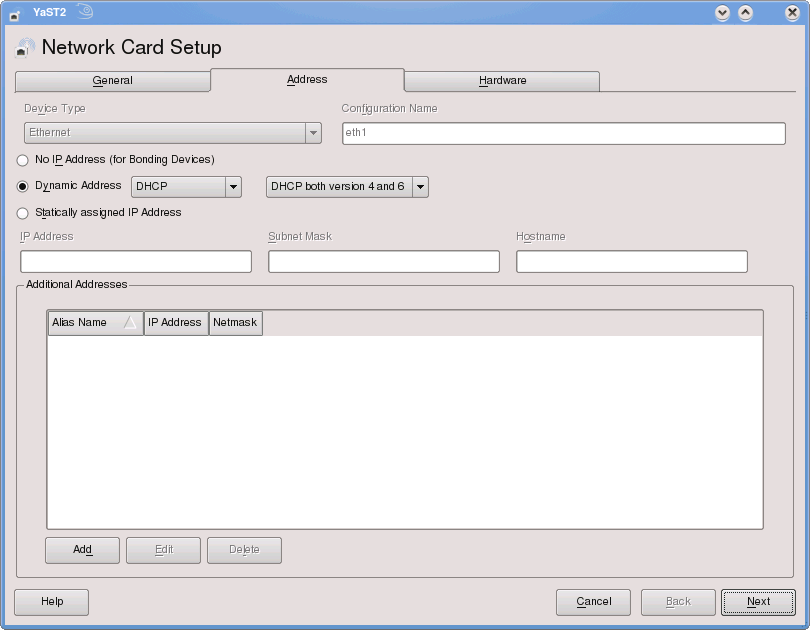
If you now select the network interface you wish to activate and click “Edit” you should get this dialog:
… just click “Next” followed by “OK” and you should be away and flying.
Package Repositories
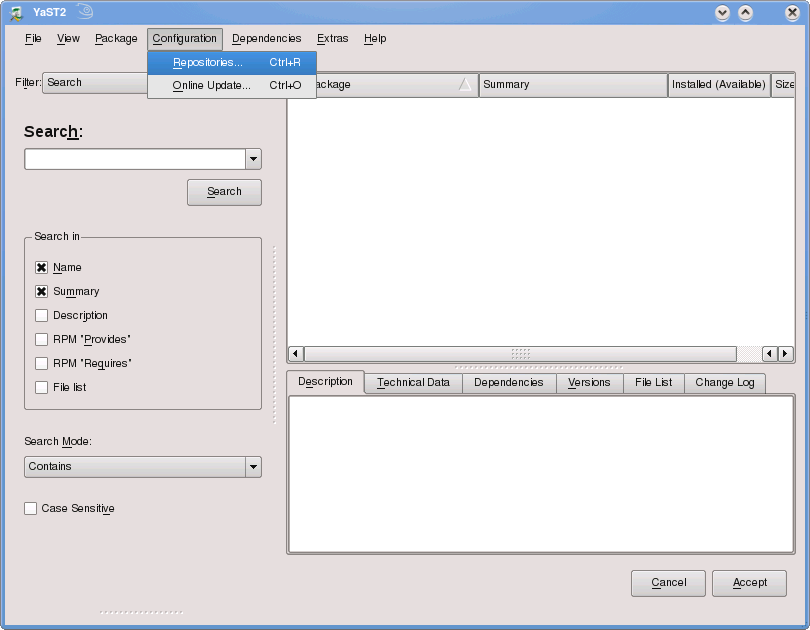
To get all the software you may want you’ll need to add more repositories to your software catalogue. There are a few different ways to add repositories to your system which we are going to use here. Firstly you’ll need to open YaST and select “Software Management” under “Software”. Once it has loaded up you’ll need to click “Configuration” → “Repositories”, like so:
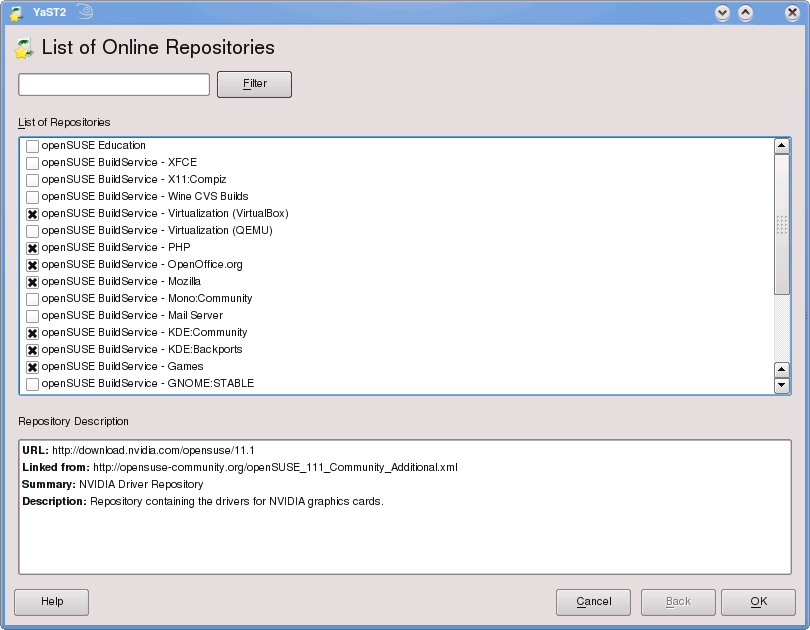
Now click “Add” and select “Community Repositories” then “Next”. This little back-handed way in getting to the Community Repositories was found on Repositories/11.1 on openSUSE Community. Be sure to select the following (remembering that italics means that is is optional):
… then press “OK”. You will probably get a few popups like this:
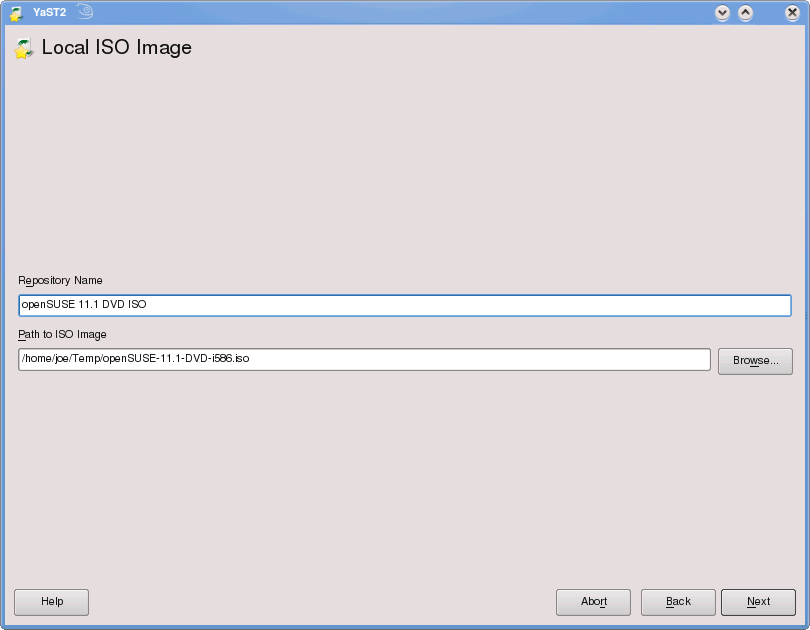
Just click “Import” if you are sure that you have selected the right ones. Now, click on “openSUSE 11.1-0” (the one for your CD/DVD drive) and un-tick “Enabled” at the bottom. Now, if you’ve still got the DVD ISO file you can add it instead of the actual DVD. This will save you having to stick the DVD into your drive all the time. To do this click “Add” → “Local ISO Image …” → “Next” and now you can give it a name then select where you’ve kept the ISO file, just like this:
Now click “Next” to take you back to the list screen.
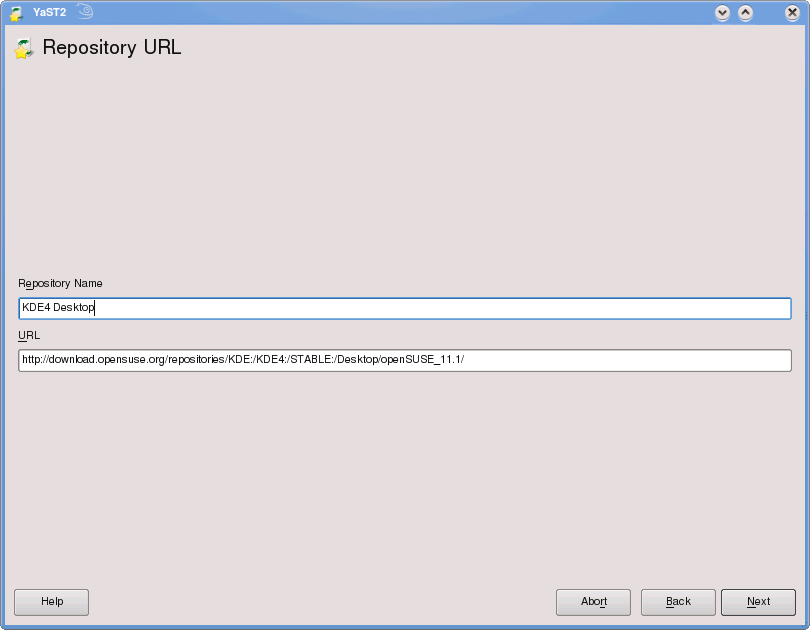
You can now click “Add” to add another new one to the list. You will have to click on “Specify URL…” this time which should look like this:
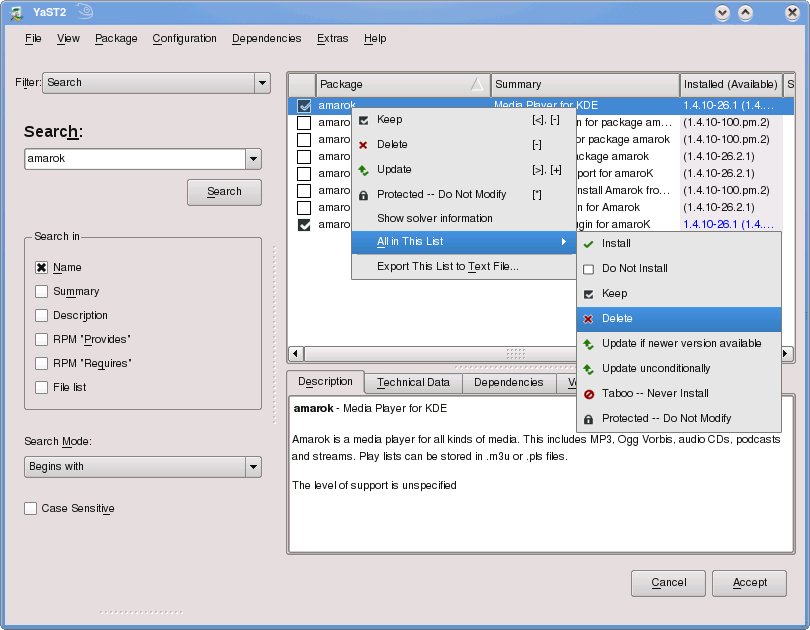
To start off with we need to remove some packages which we don’t want, in this case because they have been replaced by newer versions which have unhelpfully got different names. Using the same YaST dialog we used in the previous section (“Software Management” under “Software”) use the search box to find these packages.
amarok
digiKkam
For each one in the list right-click on it and then click “All in This List” → “Delete”, like so:
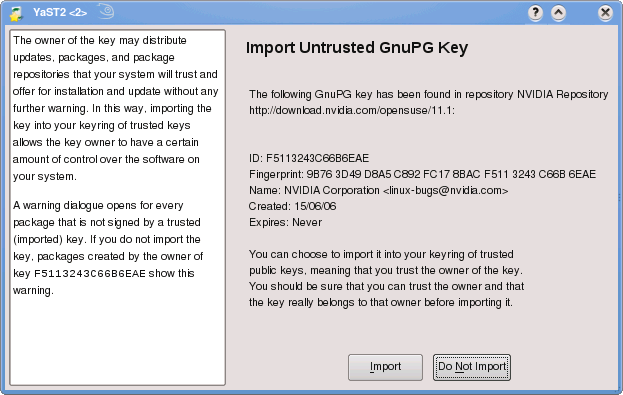
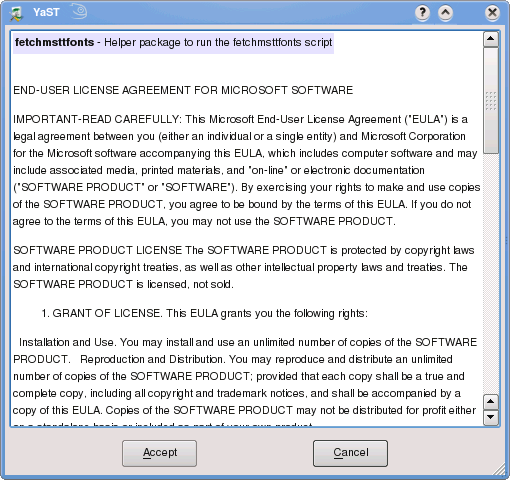
Once you’ve done just click “Accept”. Unknown to you, by now YaST has decided to install some bits of essential software behind the scenes and needs you to accept some EULAs before you can proceed, cheeky eh? One such EULA is shown below.
It’ll then ask you to agree to some automatic changes using the following dialog.
Just click “Continue”.
Installing Packages & NVIDIA Setup
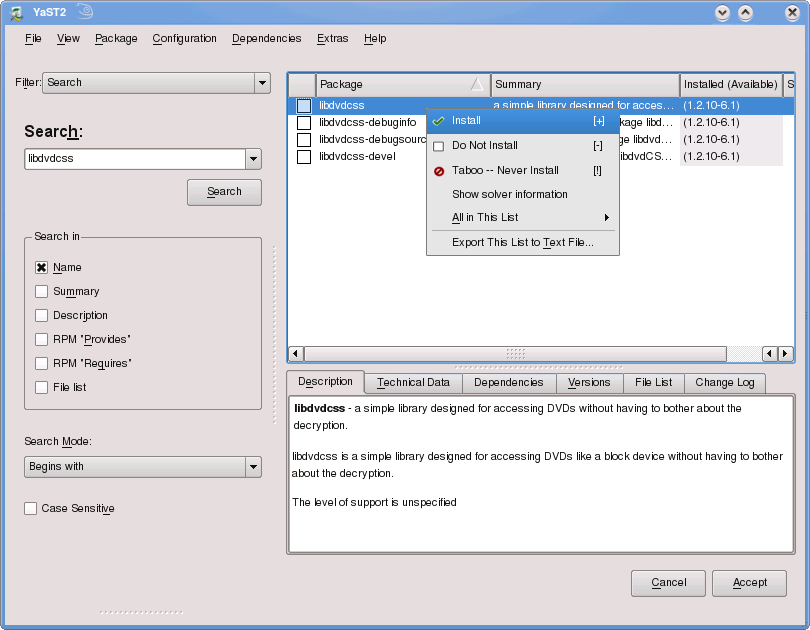
Now is the time to open YaST and install all the packages, or software, which you may want to make openSUSE work how you wish it to. Open YaST and click “Software Management”. As I am going to supply you with the exact name of each package you can un-tick “Summary” this time around to speed up the searches. Unlike previous versions of openSUSE we can’t do all this in one go. So, I’m going to give you a little list to go through first and then we’ll move on. So, search for the package in the list below and tick the box next to its name to mark it for installation, like:
libdvdcss
Now press “Accept”. The “Software Management” part of YaST will now close down once it has finished installing that package.
Note: now click on “Software Repositories” and select the VideoLan repository - and un-tick the “Enabled” box and click “OK”. This step is very important. This little step was found in a post on the thread entitled Multi-media Restricted Format Installation Guide on the openSUSE Forums.
Now you can go back into “Software Management” and go through the following list. Click “Accept” once you’ve marked the whole list. Some may already be ticked - it’s no problem, just move onto the next item. Ones in italics are optional, do them if you think you’ll need the software for your specific needs.
If you want to save some time then you can use the YaST Meta package associated with this process instead of typing in all the package names yourself. All you have to do is Install software via 1-click and YaST will open up and add some of the repositories for you and then install all the packages in the following list.
acroread (PDF Reader)
audacity (Audio Editor)
autopano-sift-C (Photo Alignment Tool)
avidemux-qt (Video Editor)
blender (3D Model Editor)
chromium (Web Browser)
cmake
desktop-data-openSUSE-extra
dia (Utility for creating diagrams)
faac
ffmpeg
ffmpeg2theora
flac
gcc
gcc-c++
gcc-fortran (Fortran Compiler)
get_iplayer
gnuplot (Scientific Graphing)
google-chrome-unstable (Web browser)
gpac (Provides MP4Box, which is required by podencoder)
gpsbabel (GPS Data Converter)
hugin (Panorama Stitcher)
inkscape (Vector drawing)
k9copy
k3b-codecs
kdemultimedia3-CD
kde4-akonadi
kde4-amarok
kde4-digikam
kde4-ExtractAndCompress
kde4-kate
kde4-kcharselect
kde4-kdenlive (Video Editor)
kde4-kim
kde4-klinkstatus (HTML Link Checker)
kde4-knode
kde4-kstars
kde4-ksudoku (Sudoku Game)
kde4-mplayerthumbs
kdeartwork4
kdeartwork4-icons
kdeartwork4-kwin
kdeartwork4-sounds
kdeartwork4-wallpapers
kdebase4-wallpapers
kernel-source
khtml2png
kile (LaTeX WYSIWYG Editor)
knights (Chess Game)
koffice2-kplato
koffice2-kpresenter
koffice2-krita
koffice2-kspread
koffice2-kword
LabPlot (Scientific Graphing)
lastfm
libdvdplay0
libffmpeg0
libquicktime0
libxine1-codecs
luvcview (WebCam Viewer)
lynx
mdf2iso (Converts MDF images to ISO file format)
mlt (Required for Kdenlive)
moonlight-plugin
mplayerplug-in
nvidia-gfxG02-kmp-pae
opera (Web Browser)
optipng (PNG Optimisation)
php5-curl
php5-exif
php5-ftp
php5-gd
php5-zip
php5-zlib
QLandkarte GT (GPS Map Viewer)
qt-creator (Qt IDE)
qtpfsgui (HDR Stitcher and Toner)
recordmydesktop-qt
rkhunter
scribus (Desktop Publishing)
sqlite3-devel (Required for aircrack)
transcode (Required by K3b for DVD Ripping)
ungifsicle (GIF Optimisation)
virtualbox-ose
vlc (Video Player)
w32codec-all
xmgrace (Scientific Graphing)
yast2-sshd
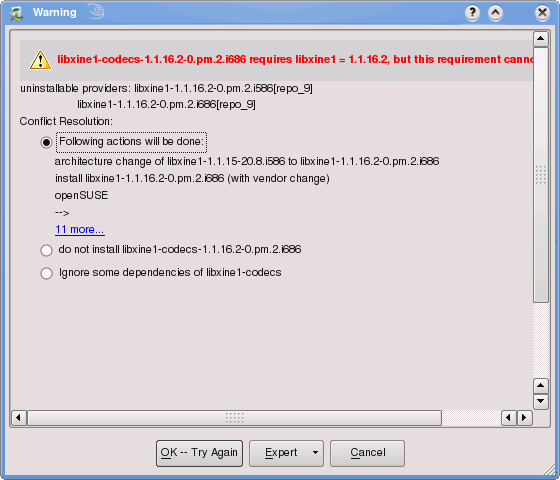
When you tick “libxine1-codecs” you may get an error like this:
It’s not a major issue, simply select the option which says Following actions will be done: architecture change of libxine1 … and click “OK -- Try Again”.
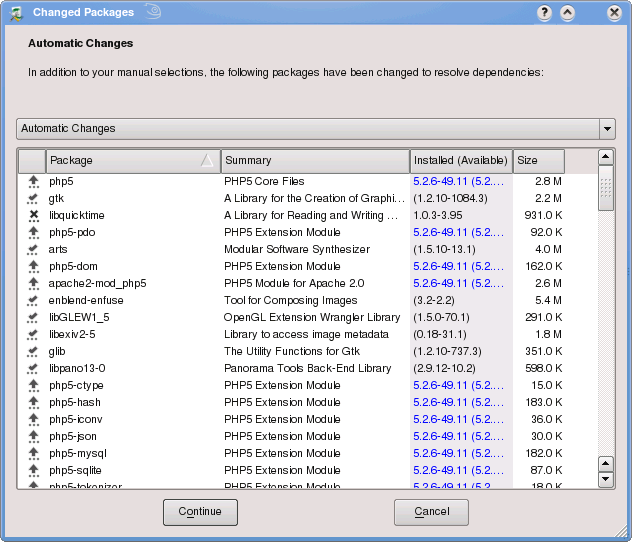
When you’ve selected the packages you wish to install click “Accept” to continue. You will also most likely get told that some other packages have to be installed too, like this:
This isn’t a problem either, just accept all the extra packages. If YaST didn’t say anything about having to restart your computer before the updates have finished then follow these steps to activate the NVIDIA drivers (else restart your computer):
Close all programs which are open
Open a Konsole window
Type sudo su
Type modprobe nvidia
Close the Konsole window
Press Ctrl-Alt-Backspace
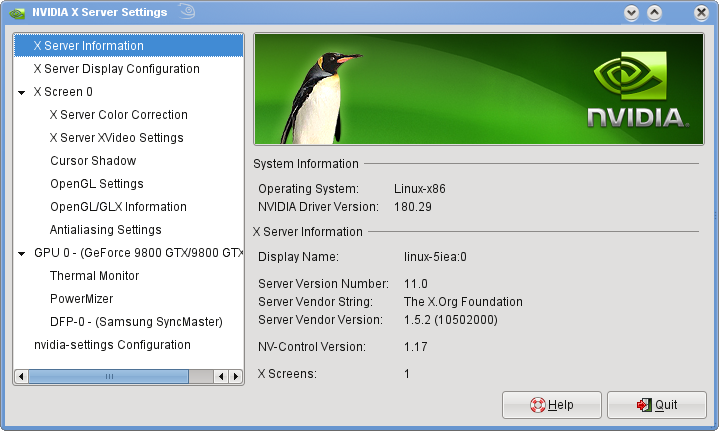
It should work now in all its 3D glory since the NVIDIA drivers have been installed. This means that you have 3D Hardware Support enabled and working. You should be able to open up the NVIDIA software from your menu by clicking “Applications” → “System” → “Configuration” → “Configure NVIDIA X Server Settings” and the program should look like this:
Adobe AIR
It is possible (and easy) to install Adobe AIR on Linux. Firstly, go to the Download Adobe AIR page and you’ll be able to download a bin file to your computer. When it has finished downloading you should open up a Konsole and follow these instructions:
cd to the download location
Type chmod +x AdobeAIRInstaller.bin
Type ./AdobeAIRInstaller.bin
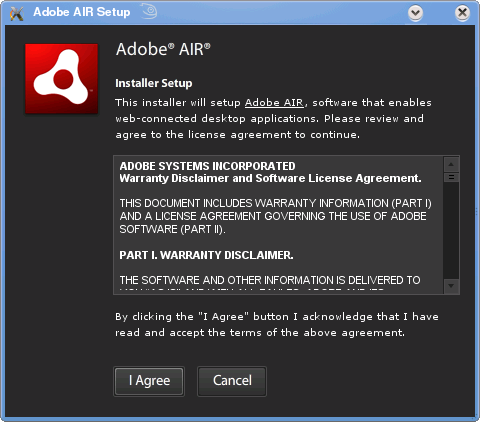
A popup should appear looking like this:
Click “I Agree” and then click “Finish”. It should now be installed for you without a hitch, nice eh?
Skype
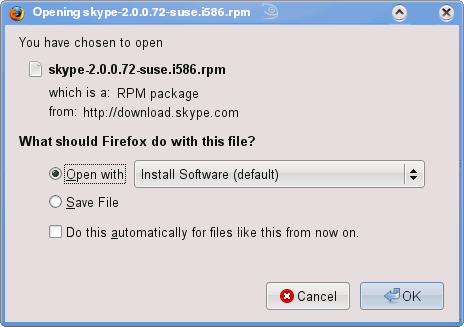
If you want to have Skype on your computer then you’ll need to visit the download Skype webpage and click on the “OpenSUSE 10+” link. You should then be presented with a download popup which looks like the one shown below for Firefox.
Just click “OK” and wait a minute for YaST to do its thing and then you’re away. How easy was that eh?
Google Earth
If you want Google Earth then go to the Google Earth website and download the latest Linux version, it’ll be a bin file so it should just be downloaded to your computer. When it has finished downloading you should open up a Konsole and follow these instructions:
cd to the download location
Type chmod +x GoogleEarthLinux.bin
Type ./GoogleEarthLinux.bin
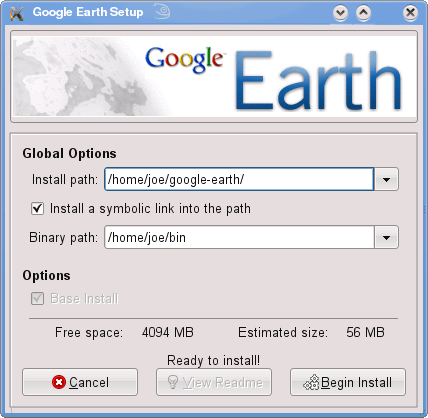
A popup should appear looking like this:
Click “Begin Install” and then (eventually) click “Start”. You may get a font warning, if so, tick “Don’t show me this again” then click “Continue”. It should now be installed for you without a hitch. However, for some people it doesn’t: if Google Earth doesn’t start up for you when you click on its icon then you may be suffering from a well known bug. Simply open up a Konsole and follow these instructions:
podencoder is just a script which converts videos to a format which lets them be able to be played on a PMP, such as my Walkman X or an iPod. I’ve tried to do one myself and, quite frankly, all the settings and parameters you must pass to the encoder are just a pain to get working so I was very glad to stumble across this little script which does it all for me. I found it at Mark Pilgrim’s mencoder based solution on the Ubuntu Community Documentation. All openSUSE users have to do is open up a Konsole, then:
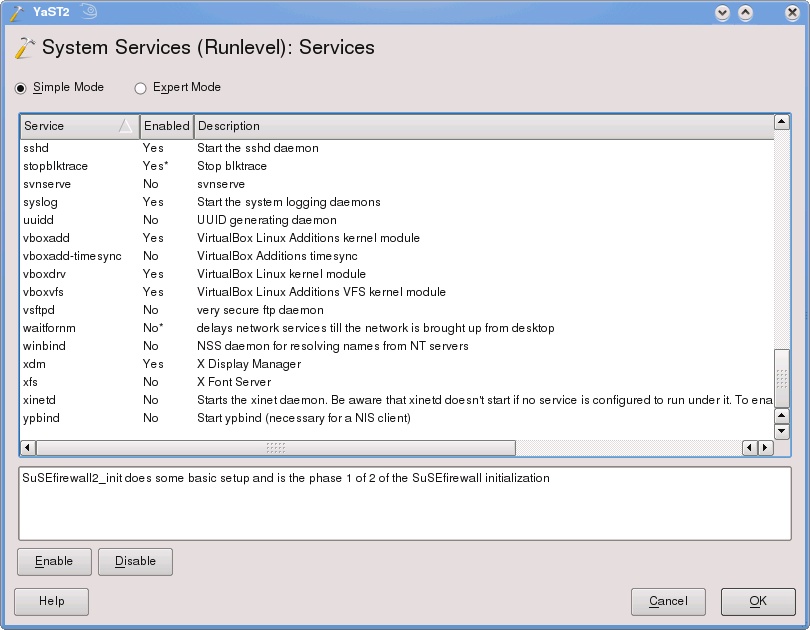
Click “System Services (Runlevel)” and you should get presented with the following dialog:
Tick the “Expert Mode” option at the top
Click “apache2” in the list
Tick “3” and “5” at the bottom
Click the “Start/Stop/Refresh” drop-down box in the bottom left
Select “Start now …”
Click “OK”
Click “OK” again
Click “Yes”
This makes Apache start whenever you logon to your computer - simple, eh?
Rewrite isn’t enabled by default in the Apache server. This means that any .htaccess files which are designed to prevent hotlinking by doing rewrites will not work in this configuration. If you’ve followed my tutorial to stop hotlinking then you’ll need to follow these instructions. These instructions are based on Enable mod_rewrite Apache 2.0 rewrite module on SuSE Linux. So open up a Konsole and follow these instructions:
Type sudo su
Type cd /etc/sysconfig/
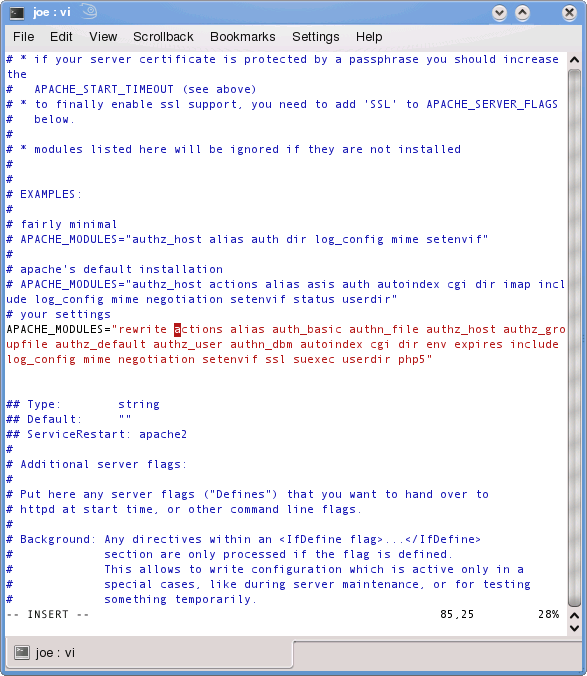
Type vi apache2
Add rewrite to the line which starts APACHE_MODULES= then :wq the file, like this:
Type SuSEconfig
Type rcapache2 restart
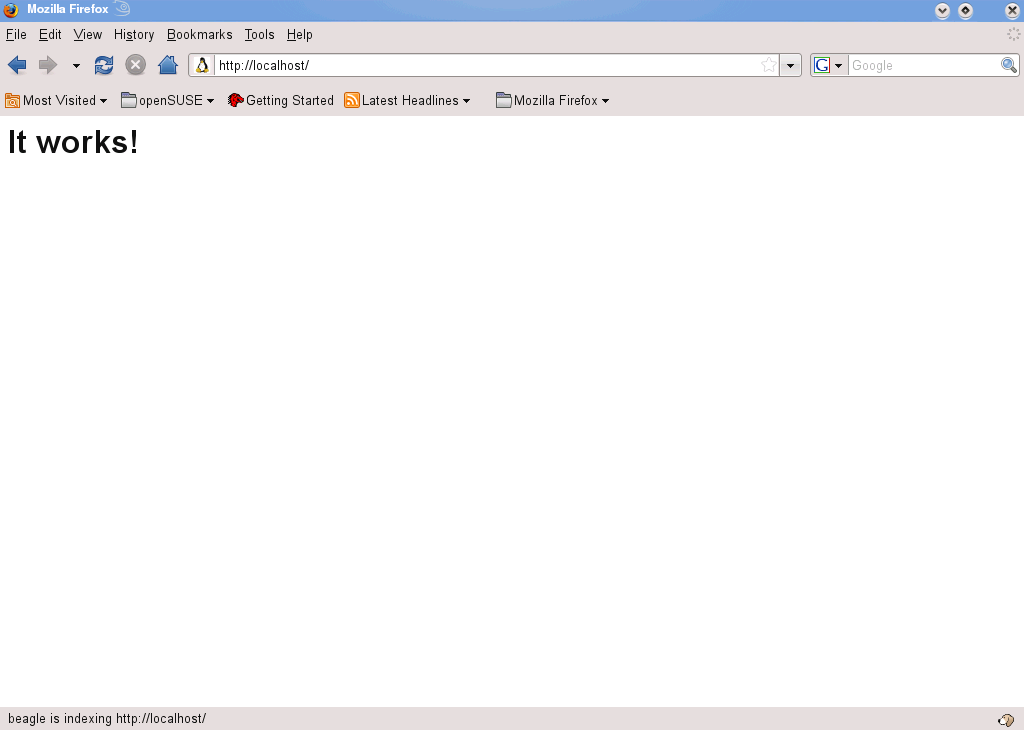
Now you should be able to type http://localhost/~USERNAME into a web browser and get a nice server running content which is in /home/USERNAME/public_html or type http://localhost/ and get a page which says It works!, just like this:
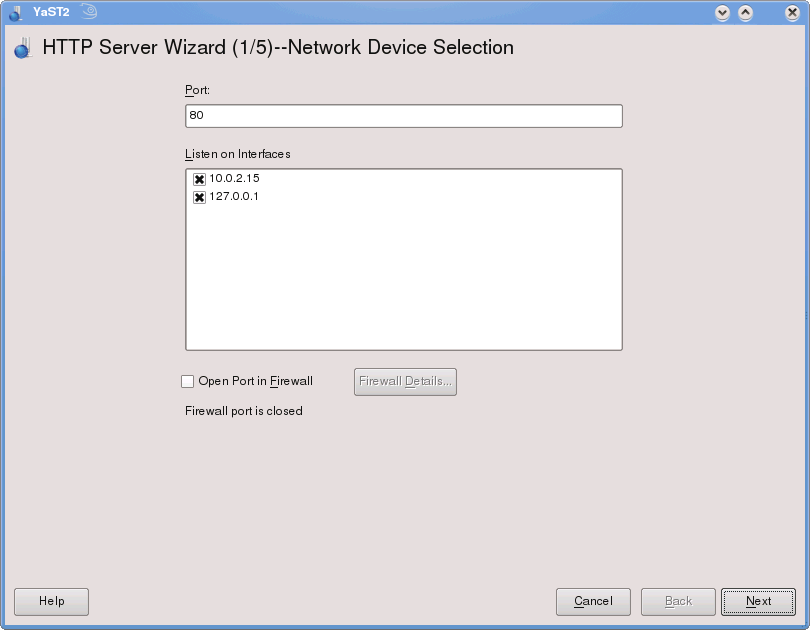
Now all you have to do now is to setup the folder which is displayed as default at localhost. To do this, open up YaST and go to “Network Services” → “HTTP Server” and you’ll get presented with the following dialog:
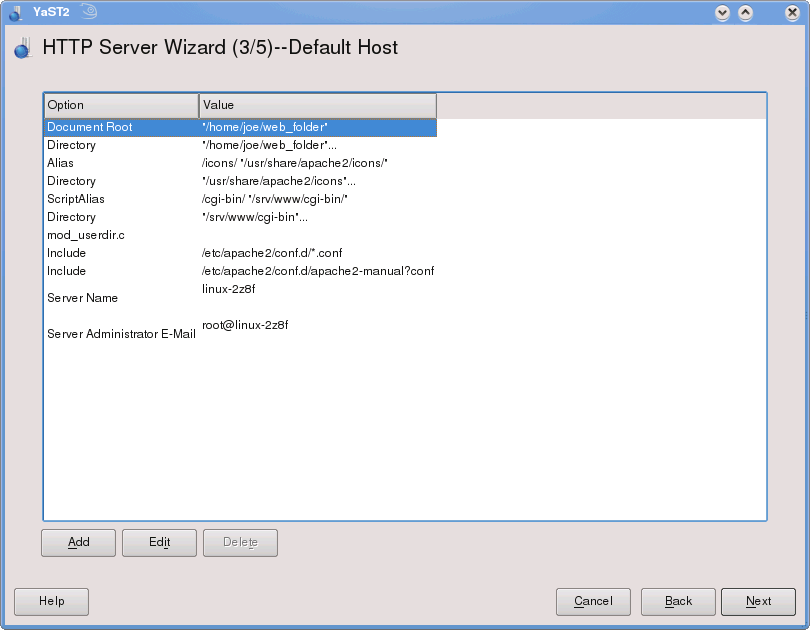
Click “Next” then “Next” and you’ll be rewarded with the following dialog:
Click “Document Root” then “Edit” and replace the folder with the root folder of your own web files. Then click “OK” and then select the first “Directory” entry in the list and click “Edit”. You now need to change the title box to be your root folder too then change the setting entitled “AllowOverride” to “All”. You can now click “OK” and then that dialog should now look something like this:
Then click “Next” then “Next” again and finally you can click “Finish”.
Fire up a web browser and type http://localhost/ and all should be there, working nicely.
FTP Server
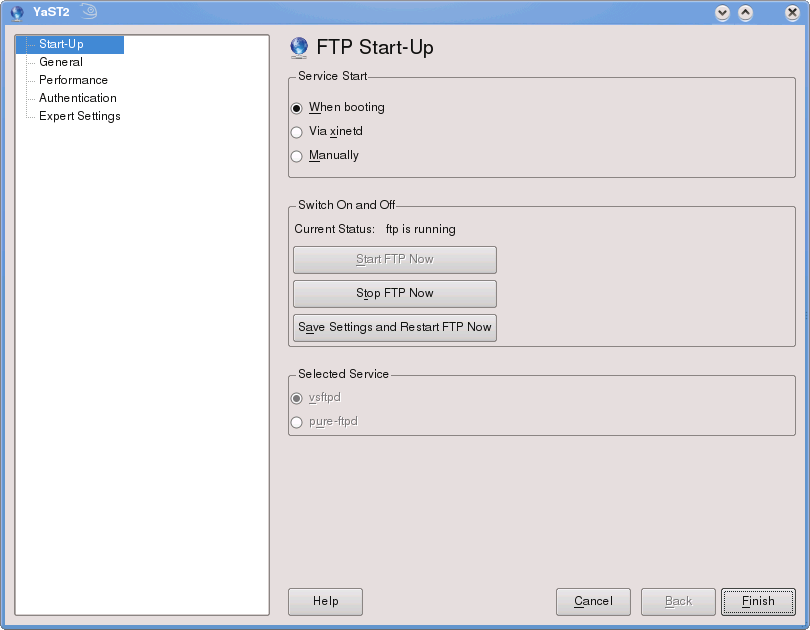
Now it’s time to set up the FTP Server in a manner you want, so open YaST then:
Click “System”
Click “System Services (Runlevel)”
Tick the “Expert Mode” option at the top
Click “vsftpd” in the list
Tick “3” and “5” at the bottom
Click the “Start/Stop/Refresh” drop-down box in the bottom left
Select “Start now …”
Click “OK”
Click “OK” again
Click “Yes”
Now you should be able to:
Click “Network Services” in YaST
Click “FTP Server” and receive this dialog:
Click “General” in the left hand menu
Tick “Chroot Everyone”
Under “Ftp Directory for Authenticated Users” type path/to/local/desired/folder
Click “Authentication”
Tick “Authenticated Users Only”
Tick “Enable Upload”
Click “Finish”
Now you should have a FTP Server up and running. You can open up a FTP client, such as FireFTP in Firefox, Konqueror or Dolphin, and connect to ftp://localhost/ with your own username and password to check that it is working.
Samba Shares
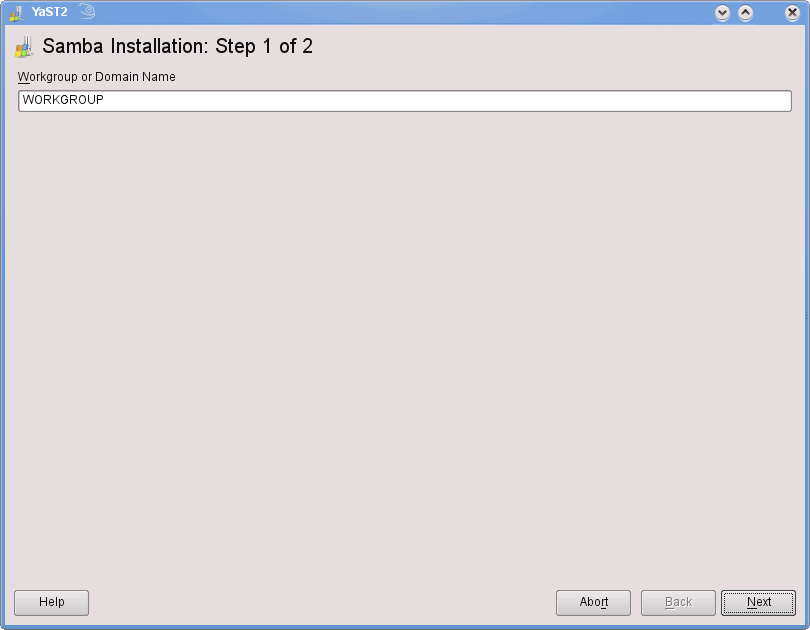
Samba is the layer which enables Linux and Windows® computers to talk to each other nicely over a network, whether that be for printing or for file sharing. I share a few of my folders over my local network using Samba so that some Windows® computers on the network can see them too. It is really easy to setup, if you decide to do so. First, you’ll need to open up YaST then go to “Network Services” → “Samba Server” which should look like the dialog below the first time you open it up.
In the box enter the name of your network workgroup, then click “Next” and you should get the following dialog.
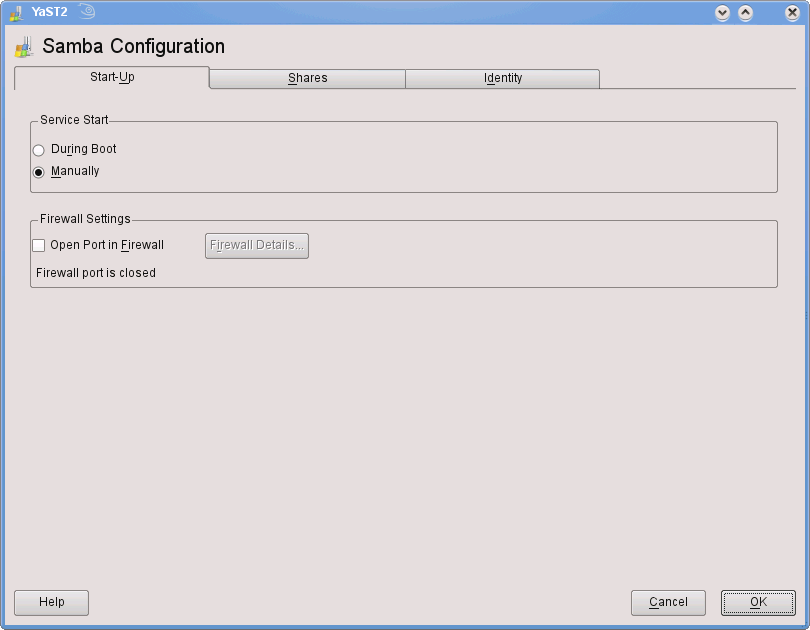
Now select “Not a Domain Controller” and then click “Next” and you should get the next dialog.
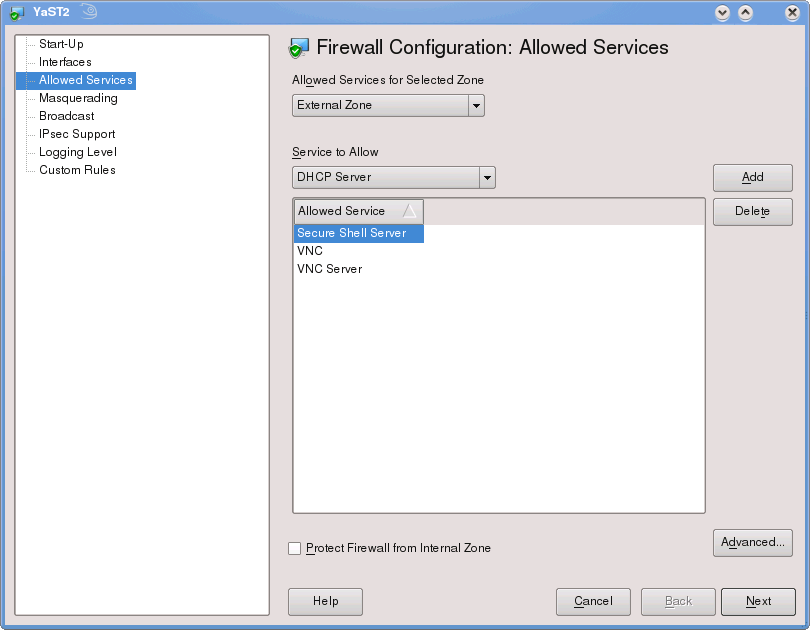
Now select “During Boot” and “Open Port in Firewall” then click “OK”. Now you should open up a file manager and navigate to a folder you wish to share on your local network and right click on it and select “Properties” → “Share”. This should now look like the popup below.
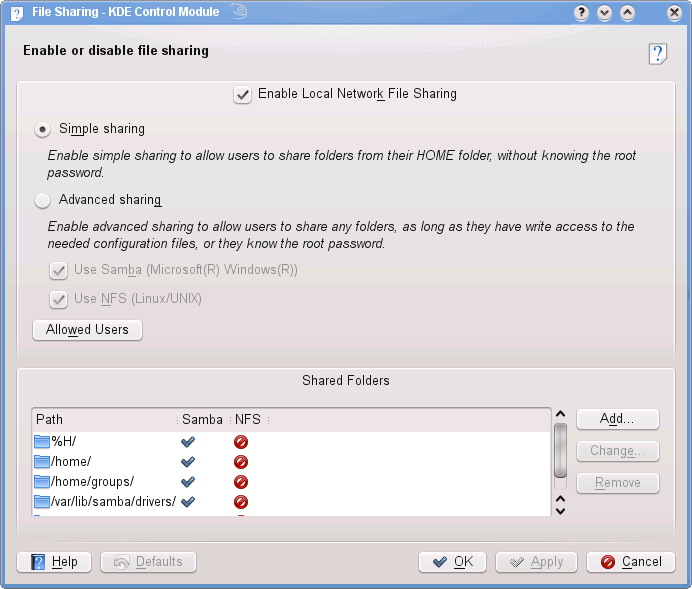
Click “Configure File Sharing …” and you should get this new dialog.
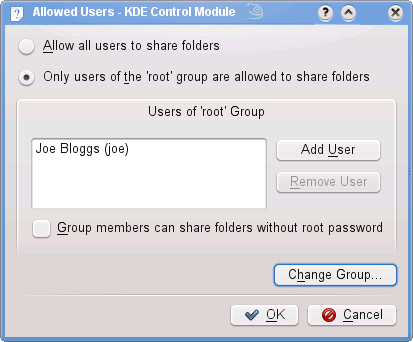
Click “Advanced sharing” and then click “Allowed Users” to get presented with the following dialog.
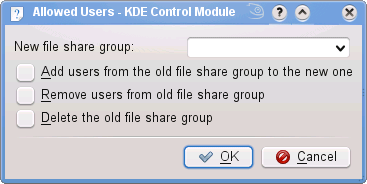
Click “Choose Group …” and you should get another popup.
In this popup I select root from the drop down box and click “OK”. Then you should get returned to the previous box, which should now have changed into the one shown below.
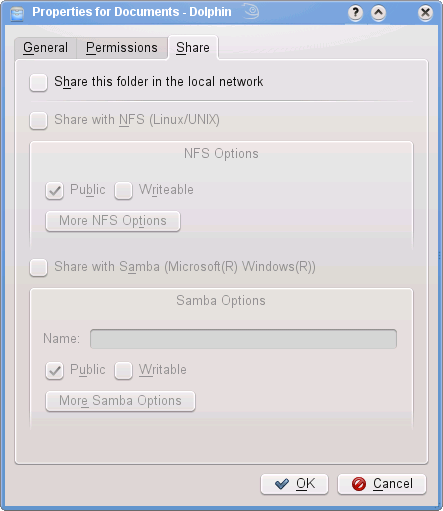
Click “OK” and “OK” again. Now it is easiest to restart your computer so that the changes can take affect and for the service to start easily. Once you’ve rebooted right click on the folder that you wish to share and select “Properties” → “Share”. This should now look like the new popup below.
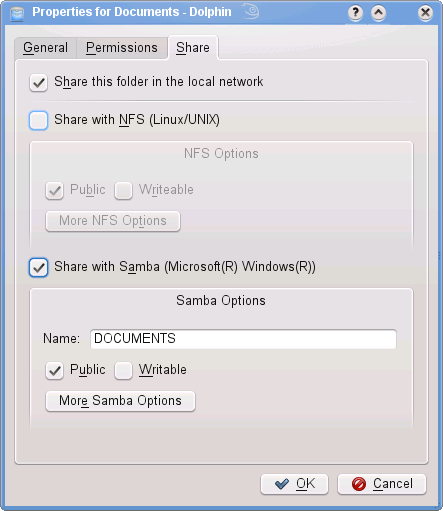
Simply tick “Share this folder on the local network” and “Share with Samba (Microsoft® Windows®)” so that it looks something like the one shown below.
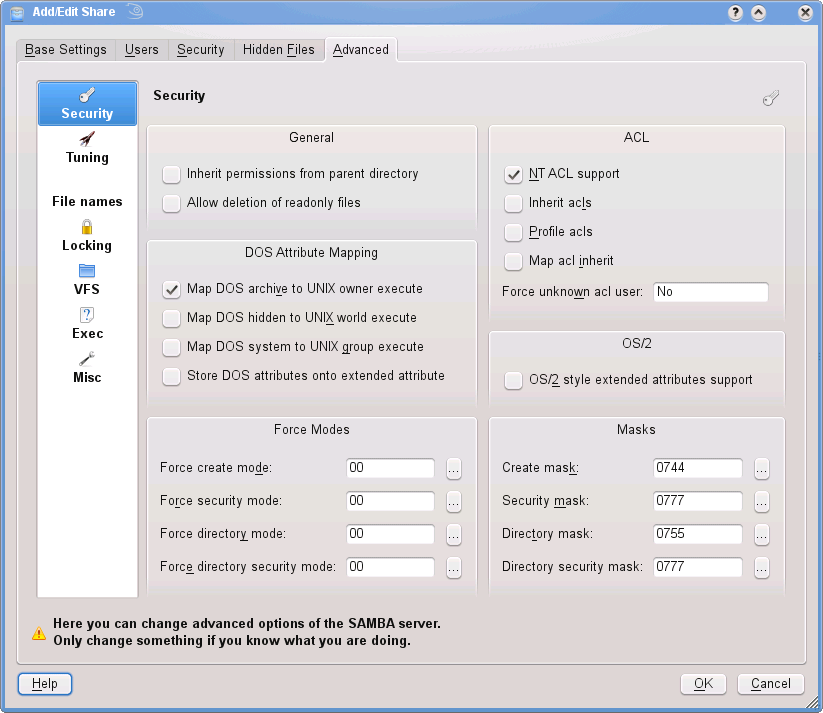
Now click “More Samba Options” and you should get another larger dialog box open up infront of you like the one shown below.
In this new popup go to the “Security” tab and then tick the box which says Only allow guest connections.
That’s it! Phew! I realise that there are a lot of dialog boxes and options in that section but it’s not that bad is it?
* Unix and Windows® Filenames
I haven’t figured out how to make this a permanent setting for removeable devices in KDE4 yet - I will though!
Links
Now is a convenient time to set up all your links. For example, if you have a separate hard drive with all your data on which you keep organised yourself, then you can link a subfolder, say “Documents”, so that it also appears as “/home/username/Documents”. There are two ways to do this:
symbolic links using the command ln -s /path/to/distant/folder /path/to/new/folder; or
the mount --bind protocol in fstab.
The first method can simply be run without a hitch, however, the second method requires you to edit a file with root access. However, it is my prefered choice as it is much less transparent to the system and simplifies the setup of the Apache and FTP servers. There is a limitation unfortunately, this method cannot work for USB devices as they are not mounted at boot (they are mounted at logon) and fstab is run at boot. So, to use the second method open up a Konsole window and type:
Type sudo su
Type cd /etc/
Type vi fstab
Add the line /path/to/distant/folder /path/to/new/folder bind defaults,bind 0 0 for every folder you wish to re-mount then :wq the file.
It should now work for you the next time you boot into Linux.
Basic Customisation
In this chapter we’ll change a lot of the basic settings of your computer so that it feels more personal and easier to work with. It also covers little tweaks and adds some basic user-friendly functionality.
Boot Loader
The boot loader is the screen you get immediately after you switch on your computer, it lets you choose which OS you’re going to use. Whenever you add a kernel update the entries change their name: I find them ugly and so I change their names to make the screen look nicer. As an example, have a look at the shot below showing the boot loader just after applying a kernel update:
I don’t change any of the other settings or configuration as it’s easy to mess up your whole system in this bit. Open YaST and click “System” then click “Boot Loader”. You should now see all the entries for your computer’s boot loader, just like mine below:
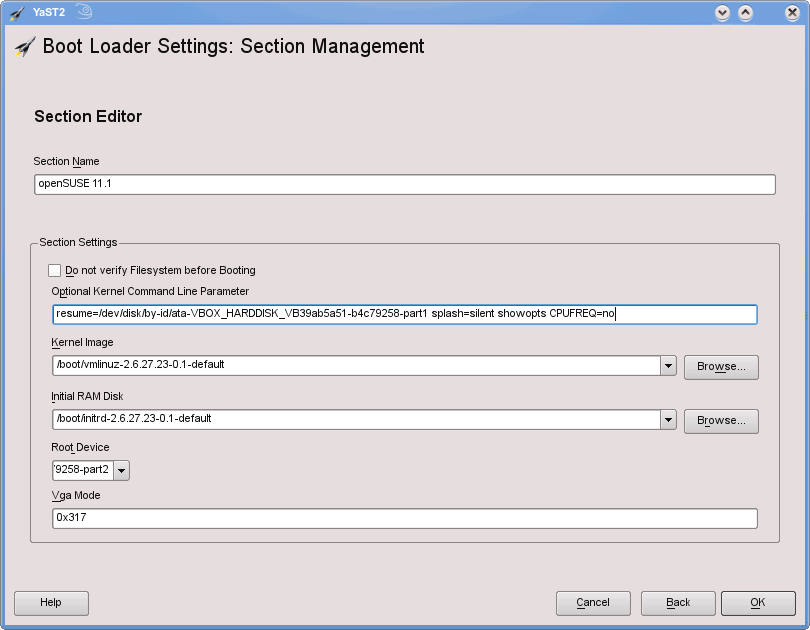
Simply click on each one in turn and click “Edit” then change the “Section Name” to something nicer. Then click “OK” and next time you reboot it will look a lot more professional I think.
Now, I came across a bug in my installation and it turns out that a solution can be implemented from the boot loader. If you open up Konqueror and navigate to sysinfo:/, have a look at your CPU speed, is it correct? If it isn’t, then you can fix this by editing each entry in the boot loader, just as above, and by typing the phrase CPUFREQ=no at the end of the “Optional Kernel Command Line Parameter” input box, just like the screen shot shown below.
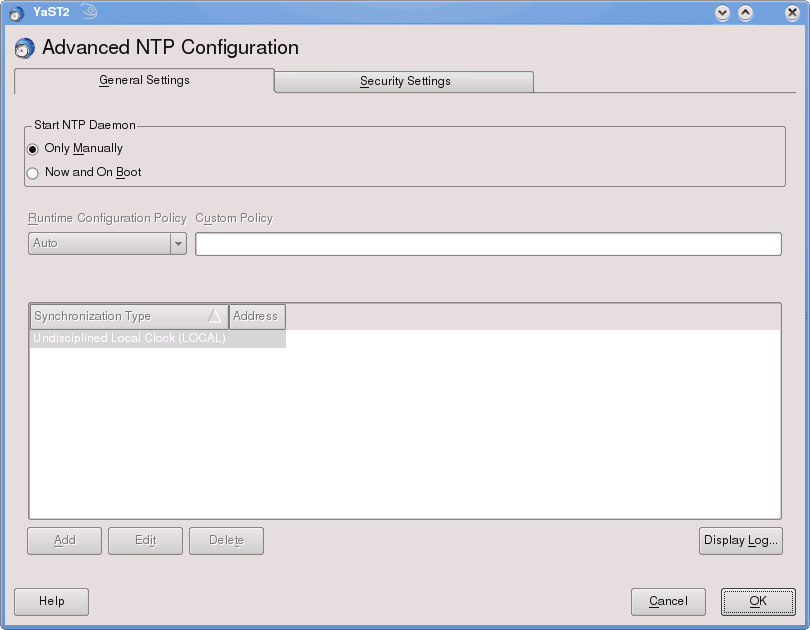
You can easily set up your computer so that it automatically synchronises its time with a remote server. To do this open YaST and click “Network Services” then click “NTP Configuration” and you should be presented with a dialog like the following one:
Check the button for “Now and On Boot”. Now click “Add” then choose “Server” then once you’ve clicked “Select …” choose “Public NTP Server” and filter by your country. You may now select the respective pool.ntp.org for your country and click “OK”, then “OK” again and “OK” once final time.
Power Saving Policies
In KDE4 the power management settings have changed and are much more integrated with the rest of the system, which is good. I now run a desktop as my main computer so I only change some of these settings. To do this …
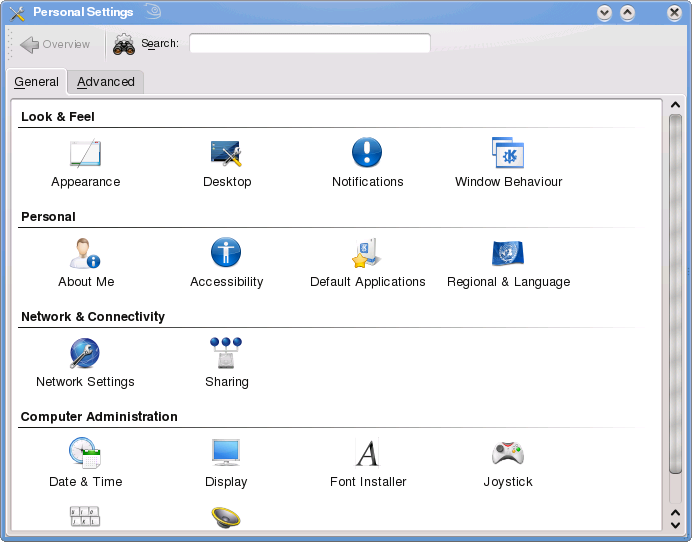
Find “Configure Desktop” in your system menu (or type settings after pressing Alt-F2) and you will be presented with the KDE Settings dialog. It looks like the screen shot below. It is worth remembering how to get here as you’ll probably have to use it again in the future fairly often.
Click “Advanced”
Click “Power Management”
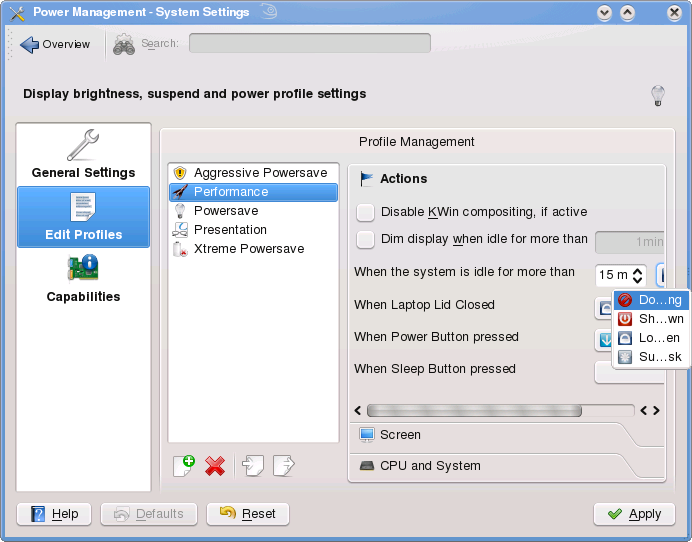
Click “Edit Profiles”
Select “Performance”
Find the option which says When the system is idle for more than15 mins and change the setting to “Do Nothing”, just like this:
Click the “Screen” tab
Un-tick “Enable display power management”
Click “Apply”
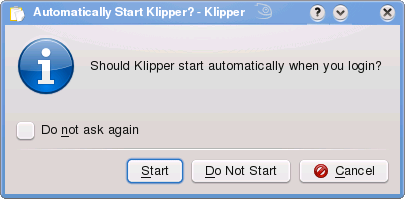
Klipper
This is an applet which runs whenever you start your computer and manages your clipboard. Personally, I don’t ever use this application so it is just another needless icon in my system tray - so I remove it. Right click on the icon and click “Quit” then “Do Not Start” when you get the following dialog.
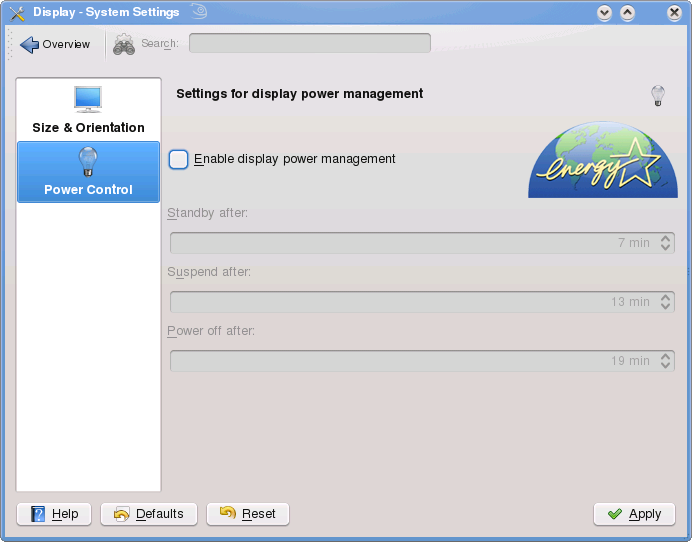
Display Power Management
You can enable/disable your screen to automatically switch off after a set period of time. For me, I don’t like this behaviour. It is enabled as default so I choose to change this. If you wish to do the same then:
Open “Configure Desktop” again
Click “Display”
Click the “Power Conrol” tab to get the following dialog:
Un-tick the box “Enable display power management” just like I did in the above screen shot
Click “Apply”
File Associations
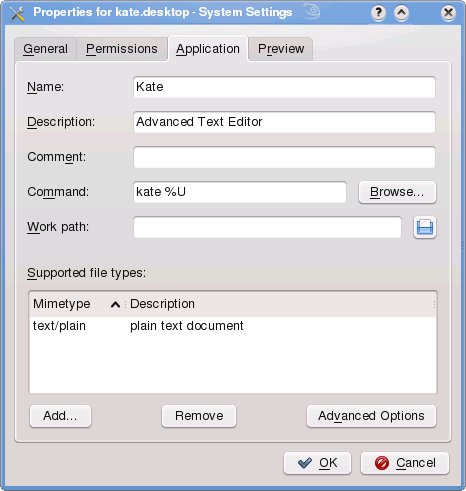
In this little section we’ll change the default file associations for many files so that they open in the preferred program, usually KATE. To start you’ll have to open up the system settings dialog again by typing settings after pressing Alt-F2, remember? Click on “Advanced” → “File Associations” then in the little text box type php. Expand the tree to select x-php. In the list on the bottom right click the entry which says Kate and click “Edit …”. In the resulting popup click “Application” and it should look like this:
Now, edit the box which contains “kate %U” and type kate --use %U there instead. This ensures that all documents which are clicked on to open up in KATE do so in a new tab instead of a new session. Now click “OK”. Now, whilst KATE is still selected press the “Move Up” button until it is at the top of the list. This ensures that it is the default application. So, for all the formats in the list below you need to move KATE up the list so that it is the default application, you can just search for them too.
application/atom+xml
application/javascript
application/rss+xml
application/xml
image/svg+xml
text/css
text/x-c++src
text/x-fortran
text/x-tex
Once you’ve done them all you’ll have to press “Apply”.
Default Web Browser
By default KDE uses Konqueror as its web browser, which is fine. Konqueror is a really good web browser and it is exceptionally powerful at handling other network protocols besides HTTP. However, I choose to have my web browser as Firefox. If you wish to do the same then open up the system settings dialog again (have you remembered how to get there by now?). Click on “Default Applications” → “Web Browser” and select “in the following browser:”. This box should now be blank so you’ll have to click the “…” button to choose your web browser in a new little popup. Once you’ve done that then just click “OK”.
* Service Menus
I haven’t figured out how to get KDE4 recognise these scripts yet. I seem to be having difficulty choosing the correct folder to save the scripts in - I will though!
Service menus in KDE are equivalent to context menus in Windows® Explorer. When you open up a file browser and right click in an empty space you get a little popup menu next to your cursor that gives you a few options about what to do. In KDE you can create these little menus very easily to add extra functionality like “Attach To Email” or “Convert To PDF” or “Optimise PNG”. In this brief chapter we’ll add a few service menus to KDE to make our life easier.
Convert PS to PDF
Now, we can also add a function to Konqueror so that we can right click on a PS file and instantly convert it to a PDF file. This is useful as most applications can print to a PS file and so we can then convert this to a PDF. Fire up a Konsole window and perform the following:
Type cd .kde/share/apps/konqueror/servicemenus/
Type touch PStoPDF.desktop
Type vi PStoPDF.desktop
Add:
12345678
[Desktop Entry]
ServiceTypes=application/postscript
Actions=PStoPDF

[Desktop Action PStoPDF]
Name=Convert PS to PDF
Icon=kpdf
Exec=ps2pdf %f
This can now be tested by navigating to a PS file in Konqueror and right clicking it and clicking on “Actions …” then “Convert PS to PDF”.
Note: it will save the new PDF to your home directory, not where the original PS was. This is due to only being allowed %f once within the Exec line of the script file, see the Exec Documentation. I may make a Bash Script to correct this in the future.
Create PDF from LaTeX File
Now, we can also add a function to Konqueror so that we can right click on a LaTeX document and instantly convert it to a PDF file. Fire up a Konsole window and perform the following:
Type cd .kde/share/apps/konqueror/servicemenus/
Type touch LaTeXtoPDF.desktop
Type vi LaTeXtoPDF.desktop
Add:
12345678
[Desktop Entry]
ServiceTypes=text/x-tex
Actions=LaTeXtoPDF

[Desktop Action LaTeXtoPDF]
Name=Convert LaTeX Document to PDF
Icon=kpdf
Exec=pdflatex %f
This can now be tested by navigating to a LaTeX Document in Konqueror and right clicking it and clicking on “Actions …” then “Convert LaTeX Document to PDF”.
Note: it will save the new PDF to your home directory, not where the original LaTeX Document was. This is due to only being allowed %f once within the Exec line of the script file, see the Exec Documentation. I may make a Bash Script to correct this in the future.
Optimise PNG images
Now, we can add a function to Konqueror so that we can right click on a PNG image and instantly optimise it - a quick and easy way to shrink production web graphics. Fire up a Konsole window and perform the following:
This can now be tested by navigating to a PNG in Konqueror and right clicking it and clicking on “Actions …” then “Optimise PNG”.
Personalisation
In this chapter we’ll really start to make you feel right at home. We’ll change all the cosmetics of your system so that it feels like a well loved comfort blanket. It’ll cover all things like screen savers, widgets and panels.
Screen saver
Exactly the same as in Windows®, it’s up to you as to what you have, if anything.
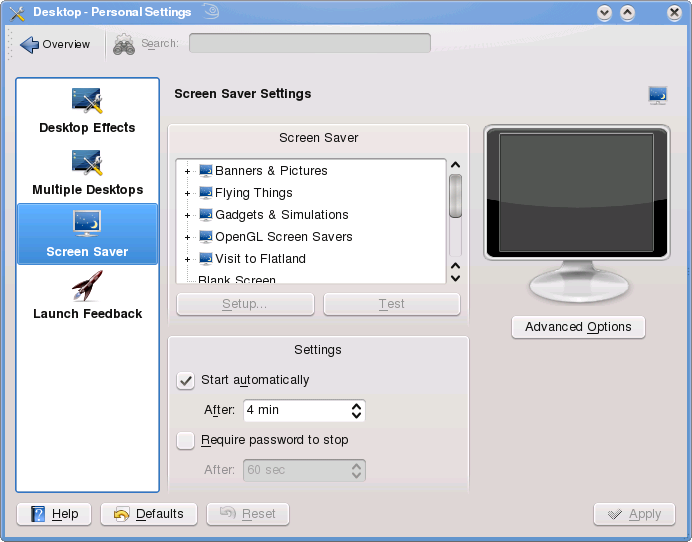
Find “Configure Desktop” in your system menu
Click “Desktop”
Click “Screen Saver” and you shall recieve the following dialog.
Choose your screen saver (or un-tick “Start Automatically” if you don’t want one)
Click “Apply”
Wallpaper
Also exactly the same as in Windows®, it’s up to you as to what you have.
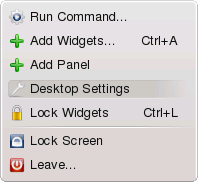
Right Click on the Desktop
Click “Desktop Settings” from the following dialog.
Then select which file you want to be displayed by clicking the blue icon on the right of the drop down box for “Picture”
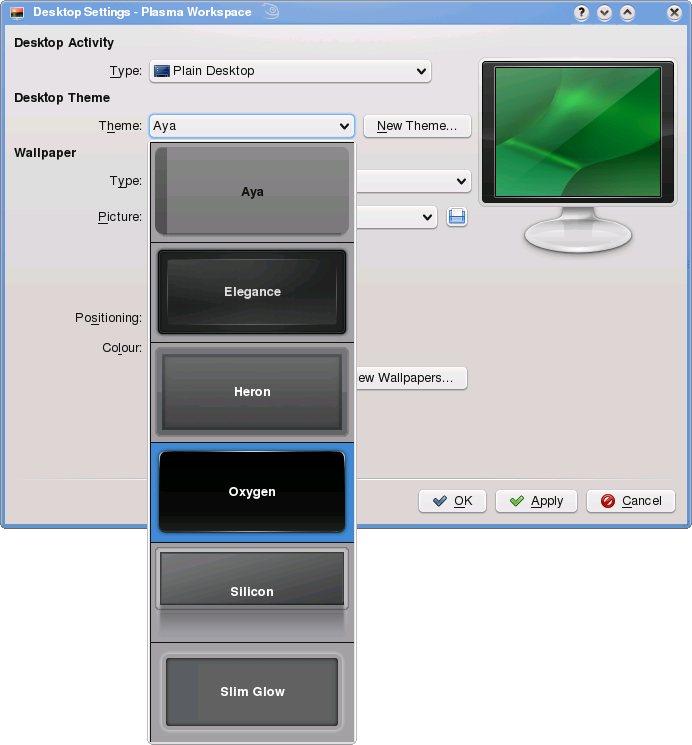
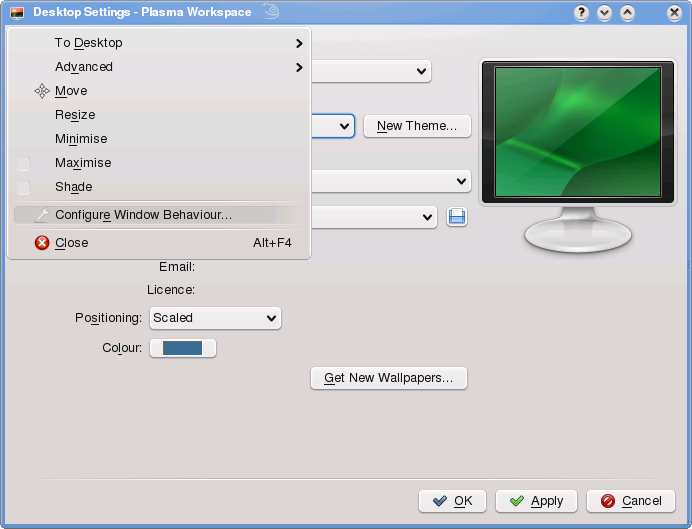
Setting up Plasma gives you much more flexability than in previous versions of KDE, so much so that I only scratch the surface of its features in this guide. You can have your desktop plain and minimalistic or chock full of widgets displaying anything from comics to the current parts of the Earth which are in sunlight! One of the first things I do is to change the theme - I prefer things to be black. So, I right-click on the desktop and open up the “Desktop Settings” dialog just like I did in the previous section. Under “Theme” I choose “Oxygen” from the list, just like this:
Whilst this program is opened click its little icon on the left corner of the frame and select “Configure Window Behaviour …” from the drop-down list, just like this:
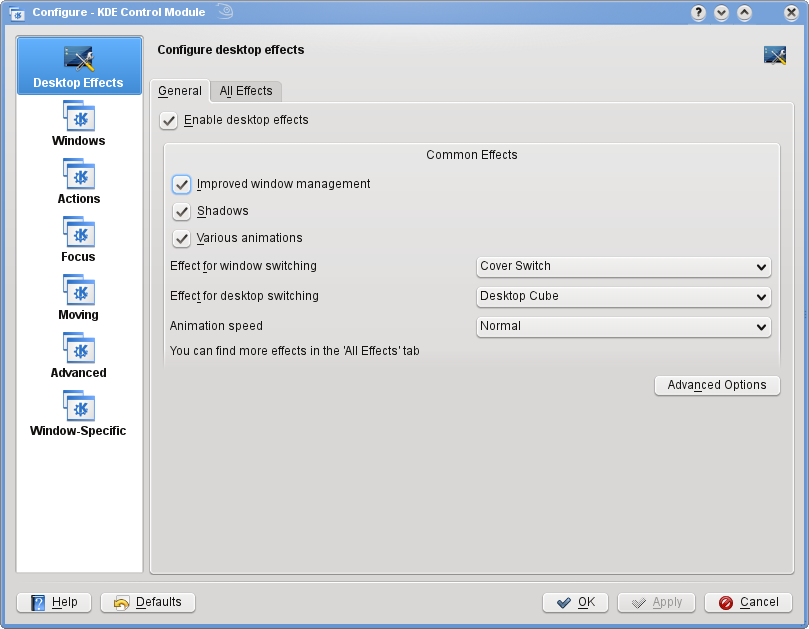
You should get a program like this:
I choose to have “Cover Switch” as my “Effect for window switching” and “Desktop Cube” for “Effect for desktop switching”. Under “Advanced” I select “Always” for “Keep window thumbnails” and I tick the option which says Disable functionality checks. I now go under the “All Effects” tab and select which components I desire. For me, these are:
Blur
Dialogue Parent
Dim Screen for Administrator Mode
Fade
Login
Logout
Minimise Animation
Present Windows
Shadow
Translucency
Wobbly Windows
Cover Switch
Desktop Cube
Desktop Grid
Taskbar Thumbnails
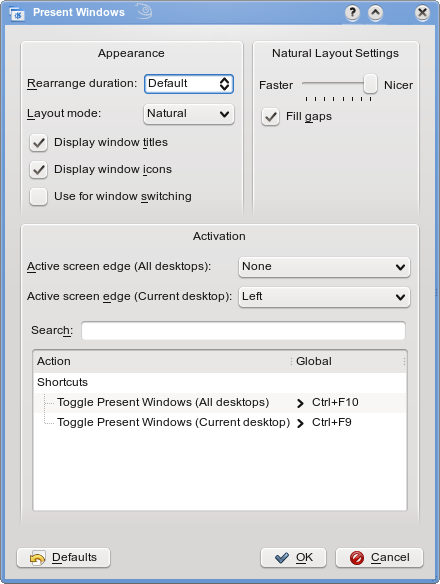
For the “Present Windows” effect I choose to have it activated when I throw my cursor to the left-hand edge of the screen. To enable this just click on the spanner to the right of the effect and select “Left” for the “Active screen edge (Current desktop)” option like the screen shot hown below. Notice how I only have it enabled for the current desktop and not all desktops.
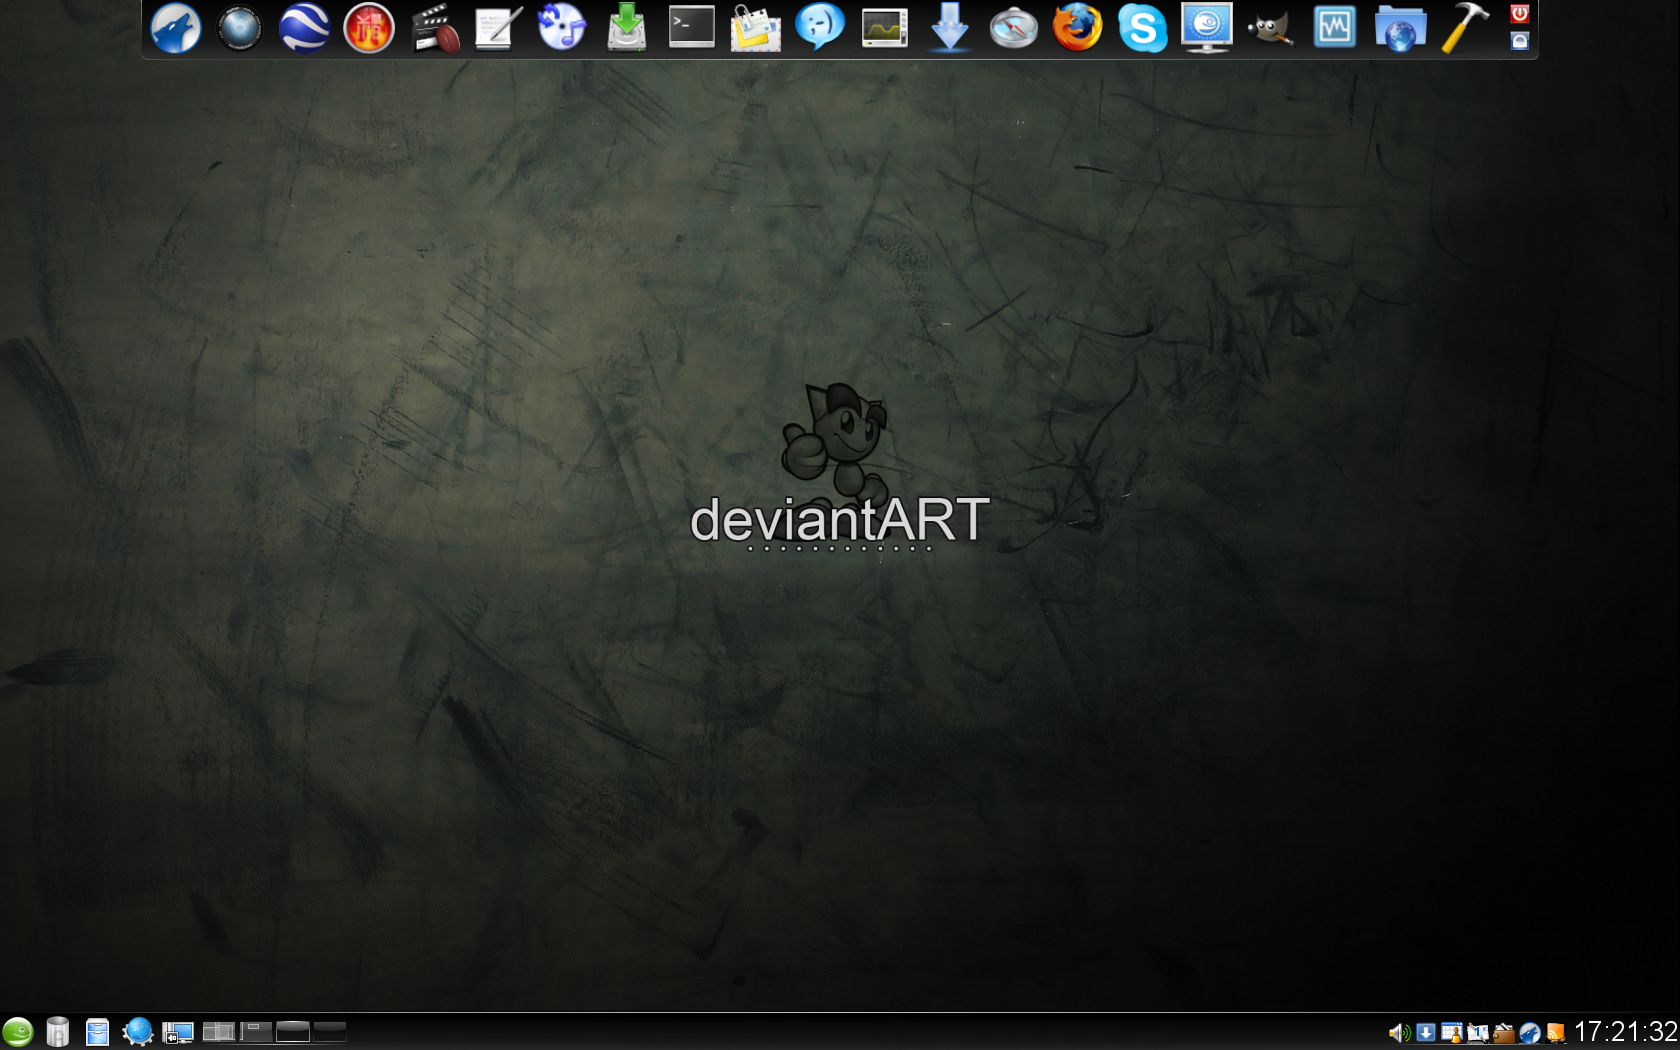
Now it’s time to customize my panels and widgets. This is all down to personal preference here more than anything so I’m simply going to show you an image of my desktop to see if you like it. The wallpaper is Deviantart Wallpaper by Mayheam on deviantART.
Customisation of Programs
Now that we’ve got you feeling at home and comfortable with your new system in the previous chapters we’ll start to customise your software so that it can be more productive for your, letting you get the job done in style.
Amarok
Amarok 2 came out recently and it snubbed a lot of people’s noses as it is so different from version 1.4, but I still stick with it. All the functionality of Amarok 1.4 is not there but there is enough to make it a good media player, hopefully it’ll be a great media player soon. Some things I do to customize it under the “Configure Amarok …” menu are:
Dolphin is now the default file manager, replacing Konqueror in that crown. Konqueror is more versatile and powerful but it can be a bit over the top sometimes which is why we have the new switch to Dolphin as the default. It is lighter and better designed at its purpose than Konqueror, hence, it is more efficient. I only tweak a few things to improve its look and feel. If you wish to do the same then look under “Configure Dolphin …” and change the following settings.
Startup
Un-tick “Editable location bar”
View Modes
General
Choose “Use common view properties for all folders”
Change the “Maximum file size” to 30MB
Un-tick “Use thumbnails embedded in files”
Icons
“Change Icon & Preview Size …” to the maximum
General
Tick “Browse through archives”
Tick “Rename inline”
In addition to these settings I change the Dolphin shortcut in the panel so that when it opens it doesn’t go to ~/Documents but to a folder of my choosing, as I use that folder more often. If you wish to do that too then right click on the icon and select “Icon Settings”. In the new dialog click on “Application” and note that the box entitled “Command:” contains dolphin %i -caption "%c" "%u". You now need to replace "%u" with /path/to/desired/folder so that the whole command looks like dolphin %i -caption "%c" /path/to/desired/folder, as shown below.
Now click “OK”. You may now notice that the icon for Dolphin has changed into an unhelpful question mark - don’t worry, it is just KDE being silly. Right click on the icon again and go to “Icon Settings” again, now just click on the big icon and the left of the dialog and a new popup should appear, like the one shown below.
Type system-file-manager into the search box and click once on the icon and then click “OK” - it should now have reverted back to its usual self. Done!
Firefox
Firefox is my web browser of choice and a huge source of my productivity. If you’re switching to Linux for the first time it probably won’t be the first time you’ve used Firefox so I’ll spare you the mantra. I customise it a bit so that it works exactly how I want, you may want to consider:
hugin is panorama stitching software. It is cross-platform and open source and uses the popular PanoTools as its engine which means that it is really good at doing what it does. You can open it up and configure it by going to “File” → “Preferences” then:
Assistant
Change “Downscale final pano” to 100
That’s all I do, the rest is just down to how well you take your photos.
Kaffeine
Kaffeine is a video player and I tend to use it often as it can support video playlists, otherwise I use VLC. One of the things I do often is load up the entirety of Futurama and play an episode randomly. The only thing I do to tweak Kaffeine is to enable auto-resizing, simply go to “View” → “Enable Auto Resize” and tick “Original Size”.
KATE
KATE is the K Advanced Text Editor and it’s the program I use for all my coding - it’s great! When you open it up for the first time you’ll most likely get presented with a choice like this:
Simply tick “Always use this choice” then press “New Session”. Here are some settings you may want to consider when setting up this program, they can be found under “Configure Kate …”.
Application
Plugins
Enable “Kate Tab Bar Extension”
Terminal
Tick “Automatically syncronise the terminal with the current document when possible”
Editor Component
Editing
General
Change “Tab width:” to “4 characters”
Tick “Remove trailing spaces while editing”
Indentation
Change “Indentation width:” to “4 characters”
Open/Save
General
Tick “Remove trailing spaces”
Advanced
Un-tick “Local files”
KATE should now be set up perfectly for you, enabling you to get your work done efficiently and easily.
KAudioCreator
This is my CD Ripper of choice and it uses cdparanoia as its back-end so you know its of high quality. When you open it up for the first time you’ll get presented with the following warning.
When you start to configure it you’ll want to consider:
which encoder you want to use, i.e., FLAC;
adding the albumartist tag to the encoder options; and
changing the encoding output location to your music archive.
Kontact
Kontact is the PIM suite for KDE and this is the first time I have decided to use it on my Linux distro. I used to use Thunderbird for my email and then scrawl things on my wall which I need to do or dates I had in the future. I always had this niggling feeling in the back of my mind that it wasn’t the best way to do things and thought I ought to use something like Kontact but I never got round to it. When KDE4 came out with Kontact ported to Qt4 I decided to take the plunge, and boy, what a difference it makes. It is a doddle to set up numerous email accounts, collate contacts, subscribe to RSS feeds and plan future commitments. The other major bonus with Kontact in general is that it blends into the OS so well that it is a pleasure to use. As you may have guessed by now, because I use it for so many things so often, I customise Kontact greatly, so please don’t be daunted by the huge list which follows.
Additionally, please don’t be daunted by the large and thorough settings dialog, like the one shown below. I hope that the way in which I have set out my instructions means that it should be fairly easy to navigate to the correct aspects.
Under the “Settings” menu there is the option to “Configure Kontact”, here is what I do:
Kontact
Always start with specific component
Summary
New Messages
Select All
Upcoming Events
Within the next 14 days
Pending To-Do
Within the next 14 days
Upcoming Special Dates
Within the next 14 days
Mail
Identities
Modify
Accounts
Add
Check mail on startup
Appearance
Layout
Show favourite folder view
Show the message preview plane next to the message list
Show never
Message List
Threaded message list
Message Window
Show HTML status bar
System Tray
Enable system tray icon
Always show KMail in system tray
Misc
Empty local wastebin folder on program exit
Security
Reading
Prefer HTML to plain text
Allow messages to load external references from the Internet
Feeds
General
Fetch all feeds on startup
I then add the following RSS feeds to Kontact and leave a few, less important ones, to Firefox. These can be added just by copying the URL and pasting it into Akregator.
I sometimes decide to subscribe to some NNTP feeds, such as the openSUSE Forums. Firstly, you’ll need to read the FAQ on NNTP. Specifically, it’ll tell you that you’ll want to change your newsgroup email to the format username@no-mx.forums.opensuse.org to counter data mining and spam. Once you’re subscribed you’ll want to join certain groups. I choose these:
Kopete is the KDE IM client and it is compatible with many different protocols, such as Windows® Live Messenger. I’ll leave it up to you to add whatever accounts you wish to add, I will simply provide a list of settings which I choose to change. Firstly, if you go under “Settings” then you can un-tick “Show Offline Users”. Then you can go to “Configure …” and perform the following alterations.
Contact List
Use contact photos when available
Behaviour
Contect automatically
Plugins
Now Listening
Advertising Mode
Show the music you are listening to in place of your status message.
Remember, Kopete is so powerful that you can be signed into multiple accounts over multiple protocols from just one instance of Kopete!
KOrganizer
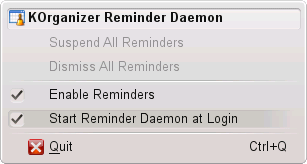
When you open Kontact for the first time the KOrganizer Reminder Client will open too. I choose to set this to start when I login to my computer so that I don’t miss an event even if Kontact isn’t open itself. To do this, simply right click on its icon in the system tray and select “Start Reminder Daemon at Login”, like so …
KTorrent
For KTorrent you’ll have to change some of the settings for optimisation. Under “Configure KTorrent …” in “Settings” you may want to consider:
Application
Default save location
Network
Maximum download speed
Maximum upload speed
Queue Manager
Decrease priority of torrents which are stalled for too long
Maximum share ratio 1.00
Advanced
Fully reserve disk space (avoids defragmentation)
Plugins
IPFilterPlugin
StatsPlugin
UPnPPlugin
Statistics
Update chart every 1
Gather data every 1
IP Filter
Use PeerGuardian Filter
MPlayer
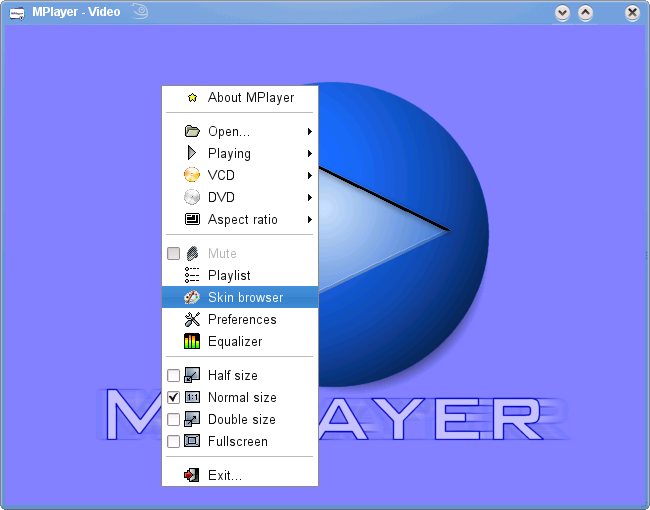
I prefer to use Kaffeine for playing videos and DVDs but sometimes it lacks codec support for some special videos, so, I am forced to use MPlayer in tandem. There is only one thing wrong with MPlayer in my mind - its skin. It is awful; it is so bad that it hinders its use! Consequently, I change the skin to something more user-friendly. Download Pasodoble for MPlayer from KDE-Look.org and extract the contents. Read the README file and follow its instructions or simply copy the extracted folder to ~/.mplayer/Skin (don’t worry if it doesn’t exist - just create it).
Now, open up MPlayer and right click on a blue part of its UI, as shown above, then select “Skin Browser” from the resulting popup menu. Just click “pasodoble-mplayer” in the list and you’re away!
OpenOffice.org Writer
Writer is the contender to Microsoft Word and I use it occasionally. To be fair, most of my typing is coding or LaTeX in KATE so I hardly use a Word Processor at all. Here are some things you may want to consider when setting up this program:
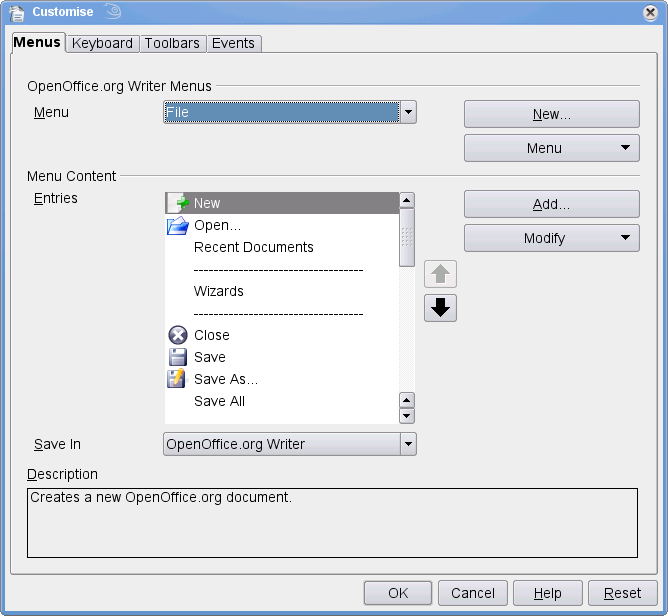
Add a custom toolbar with a “Word Count” button by going to “View” → “Toolbars” → “Customise …” and recieving the following dialog.
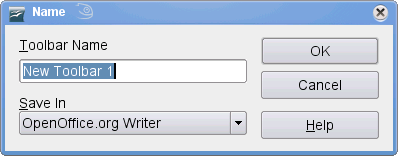
Then go to “Toolbars” → “New …” and you should get the following popup.
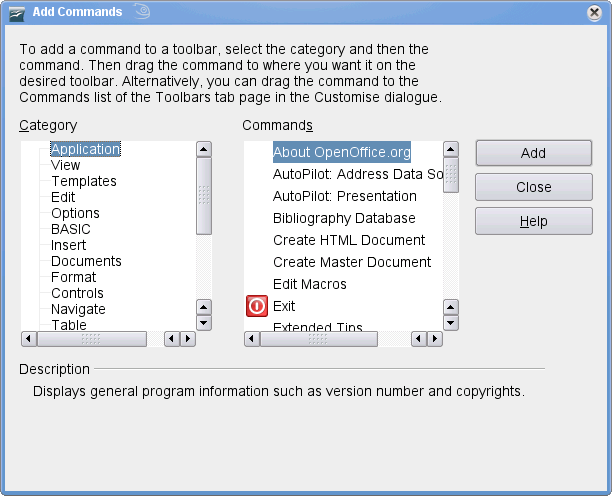
Type Word Count and click “OK” then click “Add …” and you should get the following configure box.
Now click “Options” (in the left hand list) then “Word Count” (in the right hand list) then “Add” → “Close” → “OK”.
Lock the Toolbars
Stop the spell checker automatically correcting my mistakes - I want to learn! Go to “Tools” → “AutoCorrect …” → “Word Completion” → un-tick “Enable word completion”
Change behaviour by going to “Format” → “Auto Format” and un-ticking “While Typing”
The GIMP
I like my workspaces nice and neat - uncluttered - so I do two things. Firstly, I close the second window (or dialog) which opens when you open up a file in The GIMP for the first time. It’ll remember this setting for next time. The second thing I do is to change the settings so that the layer boundaries are not shown as default. To do this go to “Edit” → “Preferences” → “Image Windows” → “Appearance” and un-tick “Show layer boundary”.
VirtualBox
Firstly, to get VirtualBox running at all you must add yourself to the vboxusers user group. To do this one should use the “User and Group Management” part of YaST. Select your username and click “Edit” then click “Details” at the top and ensure that “vboxusers” is ticked. You’ll now need to logout and then log back in for the changes to take affect. These instructions are the same ones which were in an earlier section in this guide - just scroll up for some screen shots.
When you open VirtualBox for the first time you’ll be presented with a registration form, it’s your choice really. Now you can go to “File” → “Preferences” then select the “Default Hard Disk Folder” and “Default Machine Folder” under the “General” tab. You can now start adding virtual machines to your installation - enjoy! One further piece of advice: when adding a machine with sound choose the “ALSA Audio Driver” option as this is the most compatible.
System Maintenance
In this chapter we’ll look at a few ways in which you can optimise and look after your computer, from the clearing of temporary files to the detection of rootkits.
Cron Jobs
There is a system cron job to clean out old temp files which can free up disk space on your computer, it just needs setting up first.
Open YaST
Click on “System”
Click on “etc/sysconfig Editor”
Expand “System” in the tree on the left
Expand “Cron”
Click “MAX_DAYS_IN_TMP” and type 7 in the large text field
Click “Finish”
Click “OK”
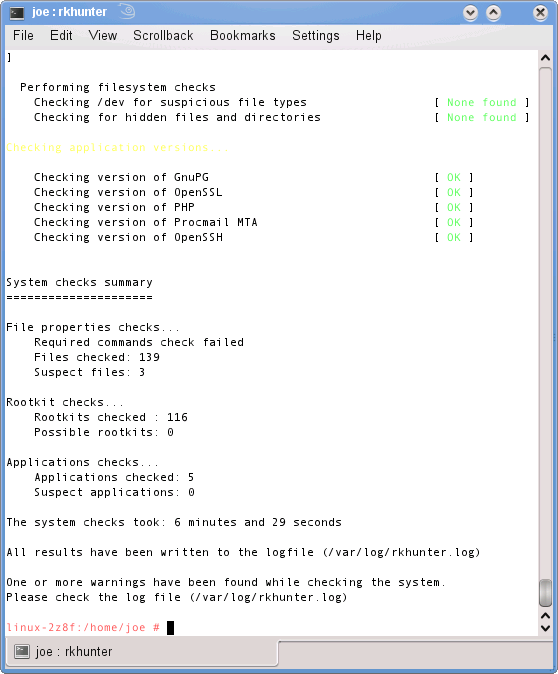
rkhunter
rkhunter checks for rootkits and other malware on your system. You can run it by opening up a Konsole window and typing sudo su then rkhunter -c -sk then sit back and read the output. It should look something like the sample output below.
Be sure to also type sudo su then rkhunter --update often to update its database.
Conclusion
I believe that openSUSE with KDE is an amazing OS which I find both practical and efficient to use. It really is very versatile and powerful and a pleasure to use, due its looks and integration. For your information I regularly use:
Adobe Acrobat and Okular for PDF Reading;
Amarok for Music Playing and iPod Management;
Audacity for Audio Editing;
Avidemux and kdenlive for Video Editing;
Kaffeine and VLC for Video and DVD Playback;
Firefox for Web Browsing;
Google Earth and Marble for Mapping;
hugin for Panorama Stitching;
K3B for Burning CD and DVDs;
Kontact for Calender, Email, Feeds and To-Dos;
KATE for Coding;
KAudioCreator for Ripping CDs;
Kopete for Chatting;
KSnapshot for taking screen shots;
KTorrent for BitTorrent;
mencoder for Video Transcoding;
OpenOffice.org Writer for Word Processing;
qtpfsgui for HDR Stitching and Tonal Mapping;
RecordMyDesktop-Qt for Video Casting;
Skype for VOIP Calls;
The GIMP for Graphic Creation; and
xmgrace for Graph Creation.
Further Reading
I present here a brief list of some resources regarding openSUSE which may help you in your future endeavours.
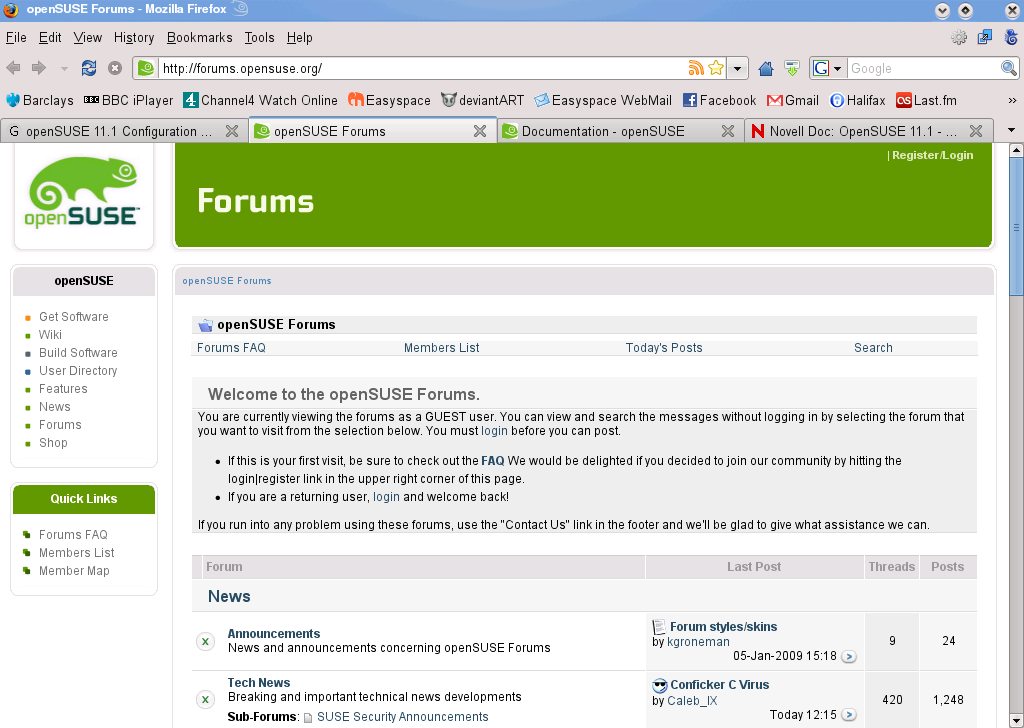
openSUSE Forums
There are some openSUSE Forums which are very useful if you get into trouble - they’re very helpful, thorough and patient.
openSUSE Wiki
No Linux distribution would be complete without its own Wiki, so try the openSUSE Wiki as it has loads of user friendly documentation.


 If you want to save some time then you can use the YaST Meta package associated with this process instead of typing in all the package names yourself. All you have to do is Install software via 1-click and YaST will open up and add some of the repositories for you and then install all the packages in the following list.